Last Updated: February 2, 2026
 日本語
日本語
 한국어
한국어
🔧 HandyDob6 Quality Notice (Feb 13–16 Amazon US Orders)
We have identified a potential issue affecting a small number of HandyDob6 units from a specific production batch sold through Amazon US between February 13 and February 16.
If you purchased your HandyDob6 during this period, we kindly ask you to review the detailed notice below and check whether your unit may be affected. If necessary, we will promptly provide a corrected replacement part at no cost.
Table of Contents
Introduction
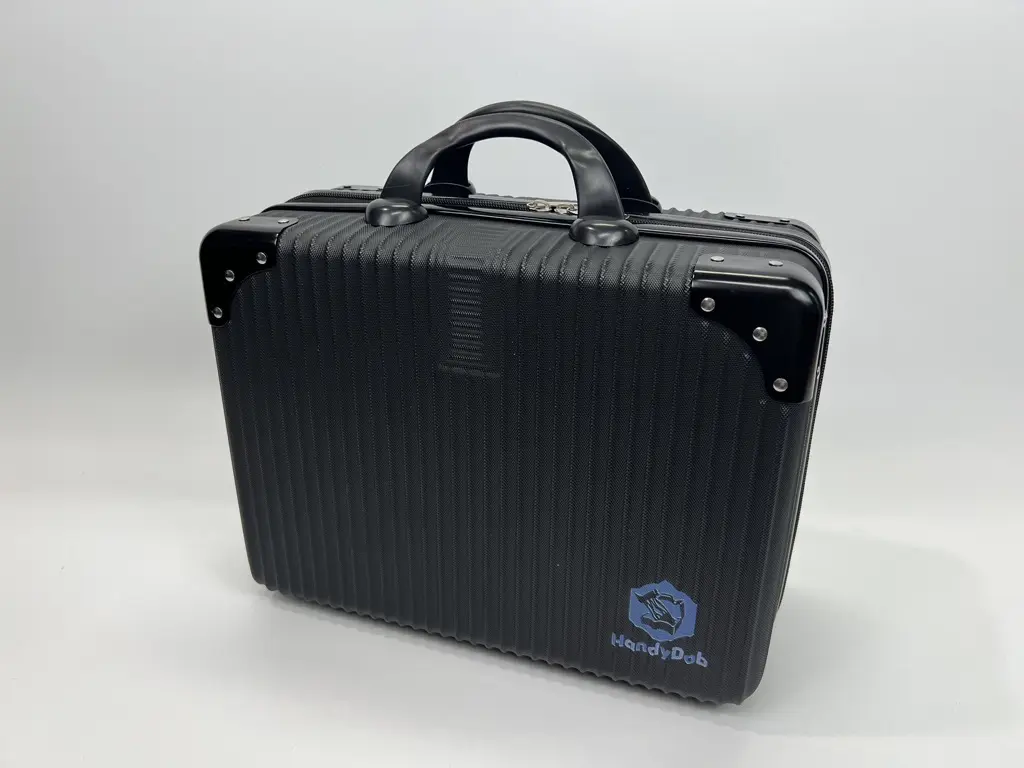
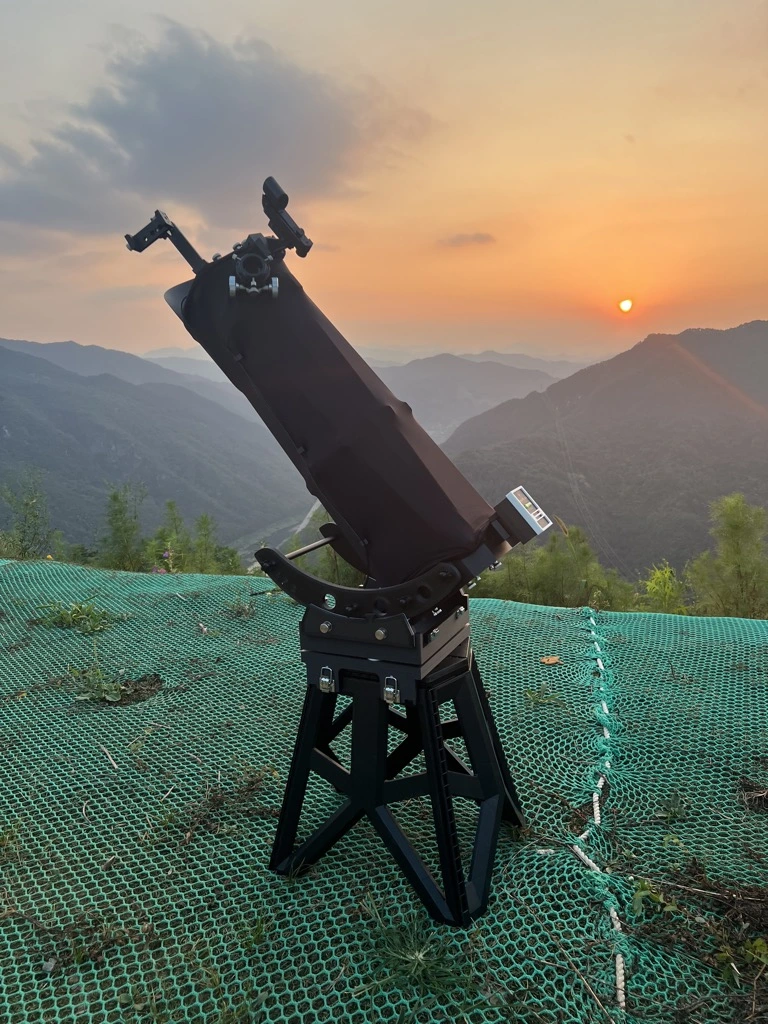
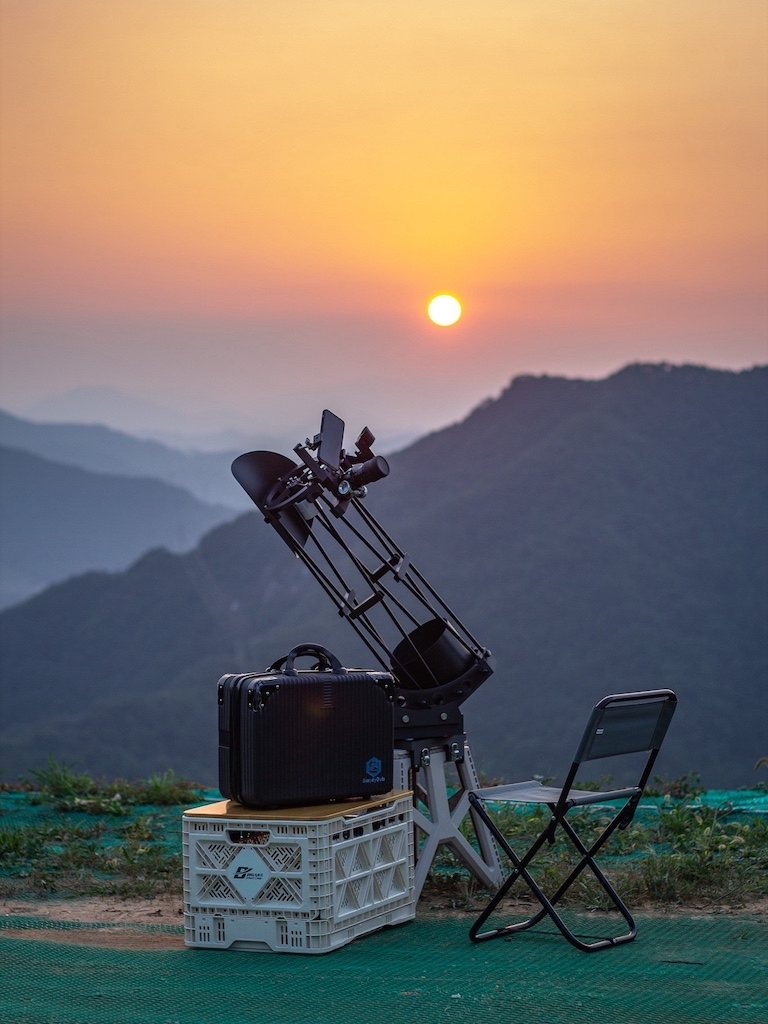
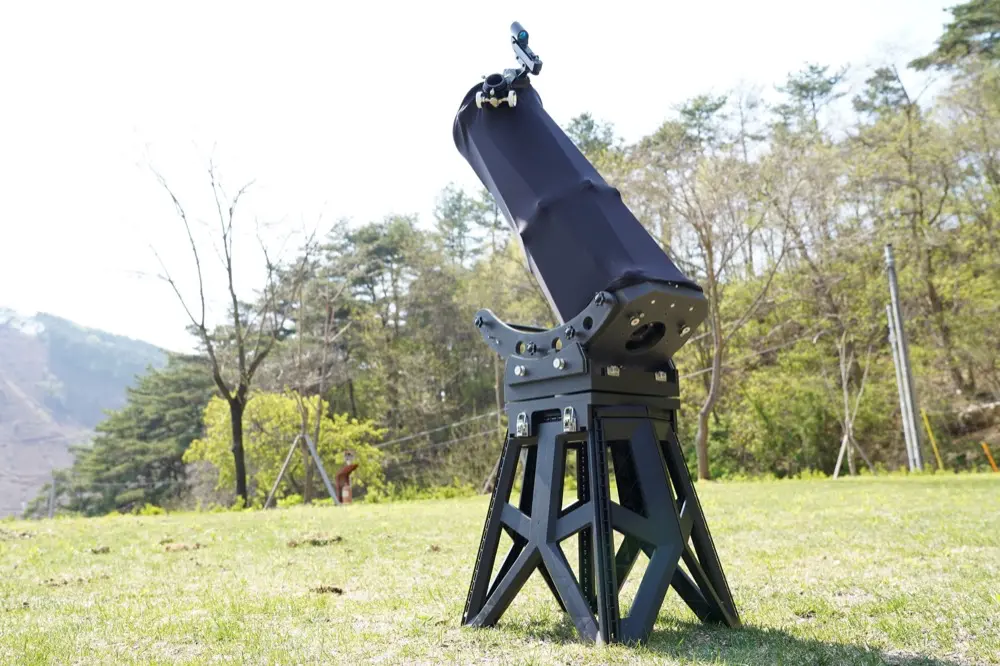
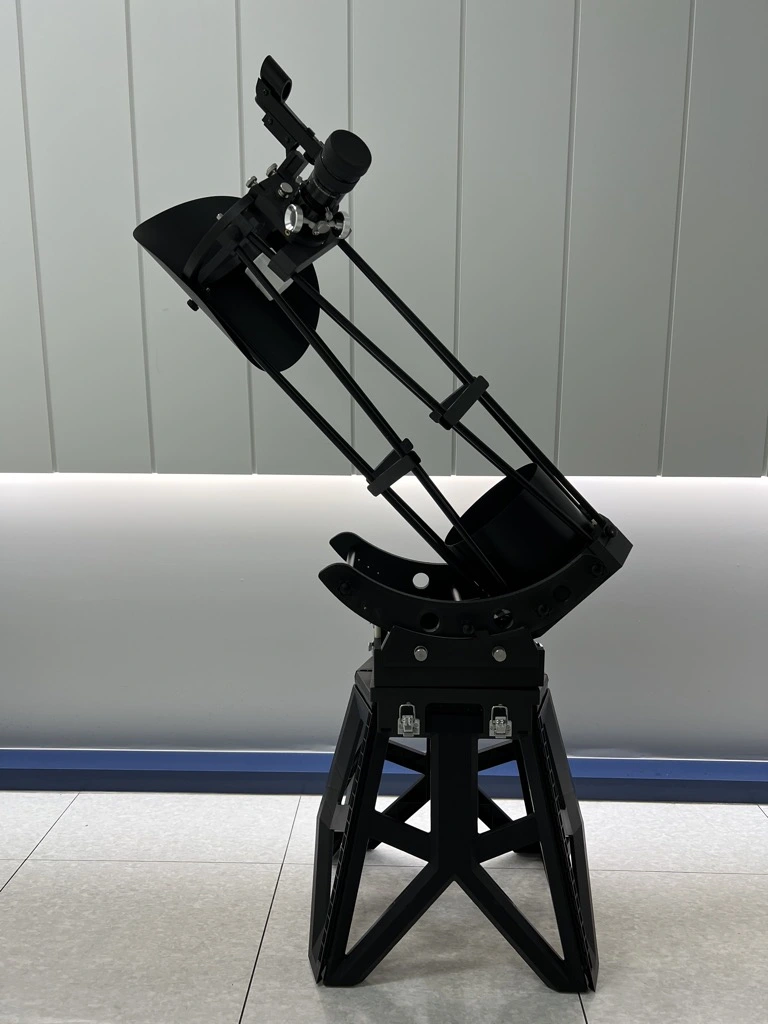
HandyDob6 is an ultra-light Dobsonian telescope optimized for portability and ease of assembly. Unlike traditional large and heavy telescopes, it features a lightweight yet strong 3D-printed frame that makes assembly and disassembly effortless. It is designed for anyone—from children to adults, beginners to experts—to enjoy astronomical observation with ease. Equipped with a 150mm (6-inch) primary mirror, it allows observation of the Moon, planets, star clusters, and galaxies. It fits into a 17-inch travel bag and is compact and lightweight enough to be carried onboard an airplane.
Specifications
| Item | Details |
|---|---|
| Type | Travel Dobsonian Telescope |
| Aperture | 150mm (parabolic mirror, protective coating) |
| Mirror Accuracy | PV 1/4 λ or better (manufacturer specification: PV 1/6–1/8 λ) |
| Focal Length | 750mm |
| F-ratio (F) | 5 |
| Secondary Mirror | 38mm (with heater, protective coating) *The secondary mirror holder is compatible with a Antares Optics 1.52" minor axis secondary mirror. |
| Focuser | 1.25", CNC machined, precision bearing slide, 35mm travel |
| Finder | Red dot finder |
| Main Body Dimensions | 250mm x 280mm x 110mm |
| Main Body Weight | 4.2kg |
| Bag Size (17") | 400mm x 300mm x 180mm (excluding handle) |
| Total Weight with Bag | 7.8kg (including all accessories) |
| Focuser Height (assembled) | 745mm (from ground when pointed at zenith) |
Features
- 3D-printed travel Dobsonian telescope
- Full frame: high-quality PETG-CF (carbon fiber composite)
- Primary/secondary mirror covers, mirror clips: PETG
- All components including truss poles fit inside travel bag
- Airplane carry-on compatible
- Passes airport screening with mini hex wrench set only
- Fast and simple assembly/disassembly
- Minimal connecting bolts (9 total)
- Primary Mirror
- Accepts mirrors up to 153mm diameter
- Adjustable with 3 collimation screws
- Magnetic detachable mirror cover with handle
- Secondary Mirror
- Built-in heater, magnetic USB 5V connection
- Protective cover and dedicated case included
- Magnetic secondary holder with positioning guide
- Recommendation for those who want to upgrade the secondary mirror
- The actual size of the secondary mirror is 38.5 mm (with slight tolerance). The secondary mirror holder is compatible with a Antares Optics 1.52" minor axis secondary mirror.
- Focuser
- 1.25", aluminum alloy CNC machined
- Precision bearing sliding system, 35mm travel
- Designed to prevent flex
- Truss Poles
- Stable weight distribution
- Supports heavy eyepieces and smartphones
- Counterweights & Balance Adjustment
- Includes 220g magnetic weight and elastic bands
- Built-in altitude lock pin (5° fixed)
- Tripod Mountable: Compatible with a 3/8" camera tripod (an astronomical tripod such as the Photoclam Astro Tripod or TC40 is recommended).
- Includes detachable dot finder and hood
- Adjustable rubber feet for leveling
- Assembly guide arrows for intuitive setup
- Cooling Fan: 40mm dual ball-bearing, magnetic, USB 5V
- Built-in bubble level
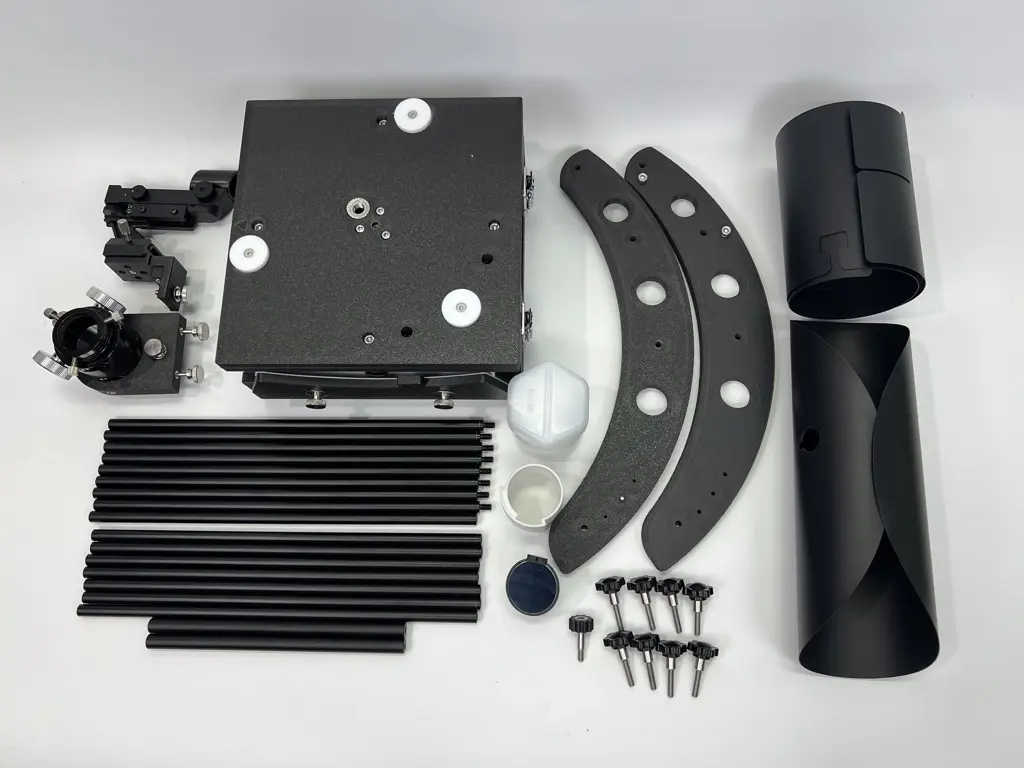
Package Contents
- Main body (upper/lower case, mirror box, mirror cell, upper cage)
- Detachable 1.25" focuser
- Truss poles (16 total, use 8 when assembled)
- 2 side bearings and 2 crossbars
- Secondary mirror (with holder), protective cover, and case
- Magnetic primary mirror cover with handle
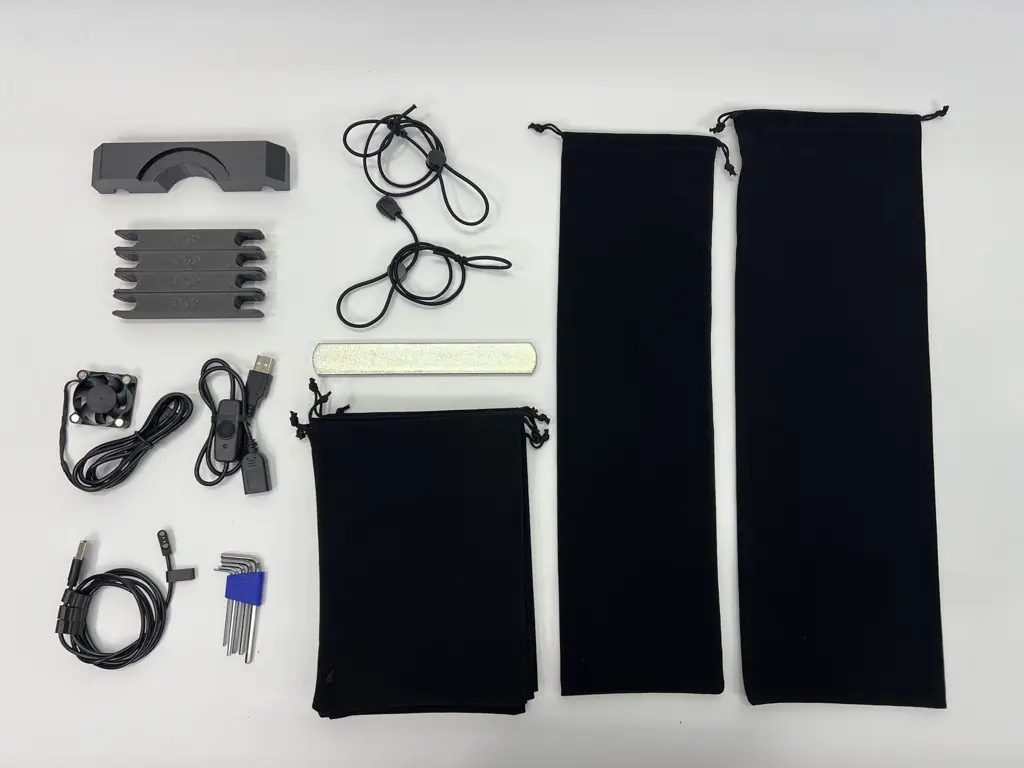
- Magnetic secondary heater cable (USB)
- USB On/Off switch for heater
- Focuser stabilizer bracket
- 4 vibration dampening brackets for truss poles
- Magnetic cooling fan
- 7 velvet pouches (1 for bearings, 1 for poles, 5 general use)
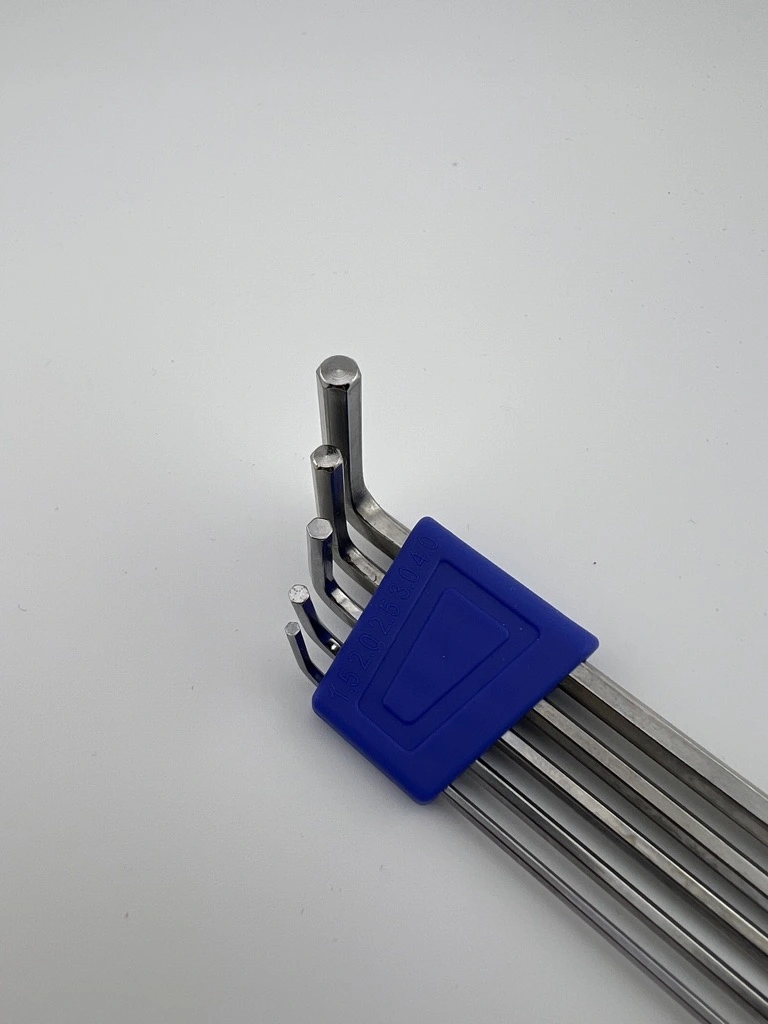
- 5-piece mini hex wrench set (1.5, 2, 2.5, 3, 4 mm)
- 220g magnetic counterweight
- 2 balance adjustment elastic bands
- Dedicated 17-inch travel bag

Assembly Videos
Full Motion and Balance Demo
Case Disassembly and Assembly
A triangular arrow guide is marked on the main body to help you identify the correct direction during assembly and disassembly.
Side Bearing Assembly
Mirror Box Installation
Truss Pole Assembly and Mirror Box Attachment
Upper Cage Attachment
Focuser & Vibration Bracket Assembly
Secondary Mirror, Heater & Cover Installation
Hood, Primary Cover, and Counterweight Attachment
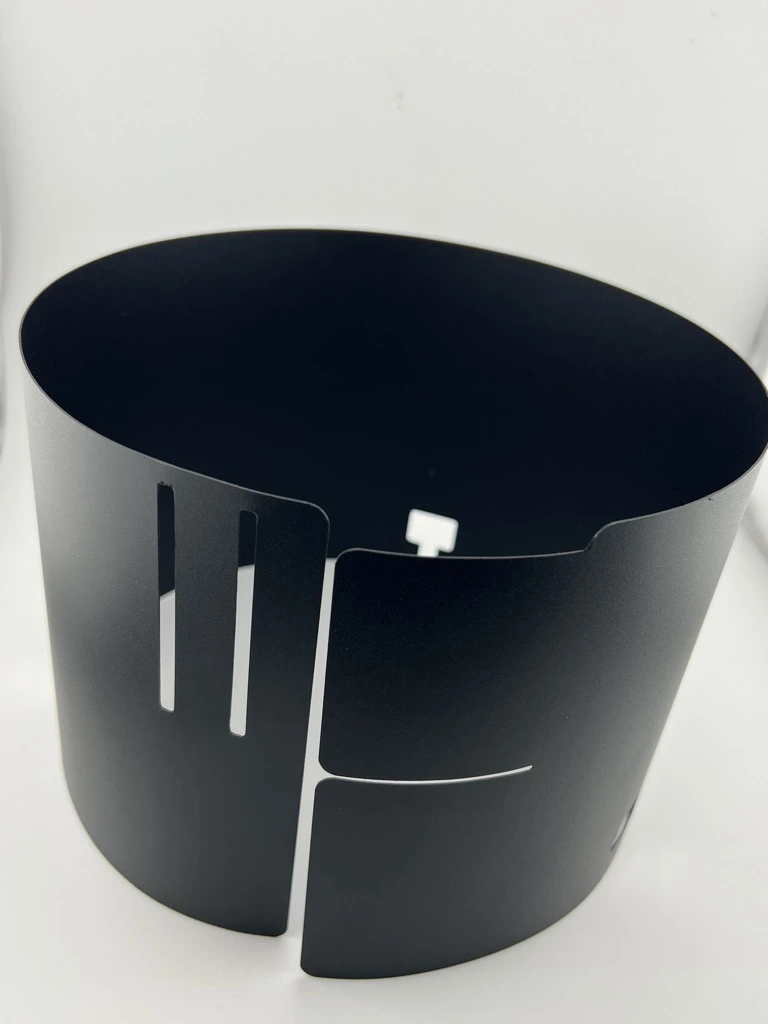
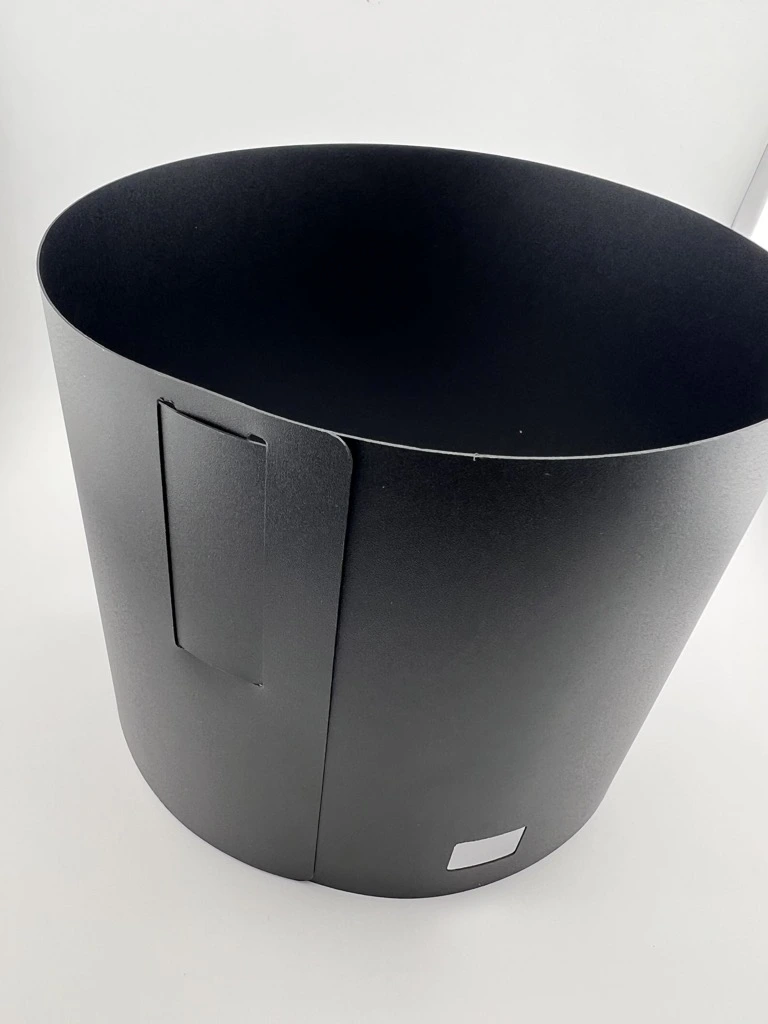
How to Install the Lower Shroud
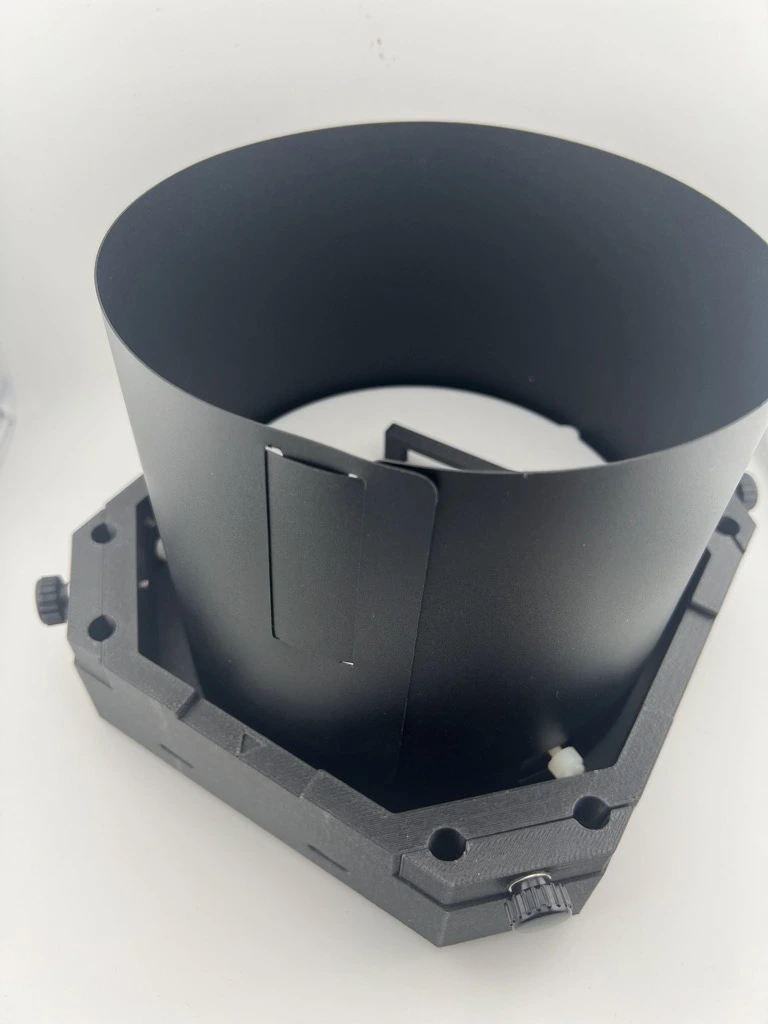
The Lower Shroud is made from a PP (polypropylene) plastic sheet and uses a snap-fit structure that secures tabs into slots by taking advantage of the material’s natural flexibility and elastic recovery.
The Lower Shroud consists of a single sheet of PP plastic that is rolled into shape during installation. Thanks to the PP sheet’s resistance to bending and its inherent elasticity, it naturally forms and maintains a stable cylindrical shape once rolled.
How to Attach a Tripod and Use Rubber Bands for Balance
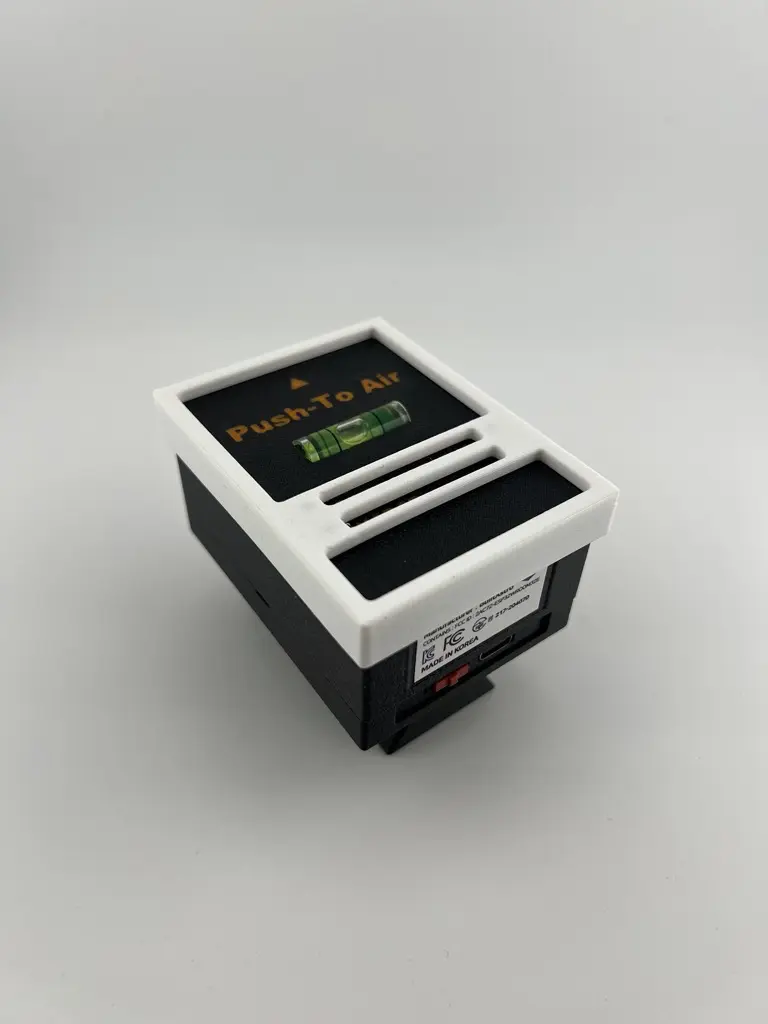
How to Install Push-To Air on the Mirror Box
The HandyDob6 package includes a bottom dovetail bracket that allows you to attach a dovetail base to the mirror box. When you install Push-To Air, you also gain an advantage in balance when using heavier eyepieces, as it adds helpful counterweight to the system.
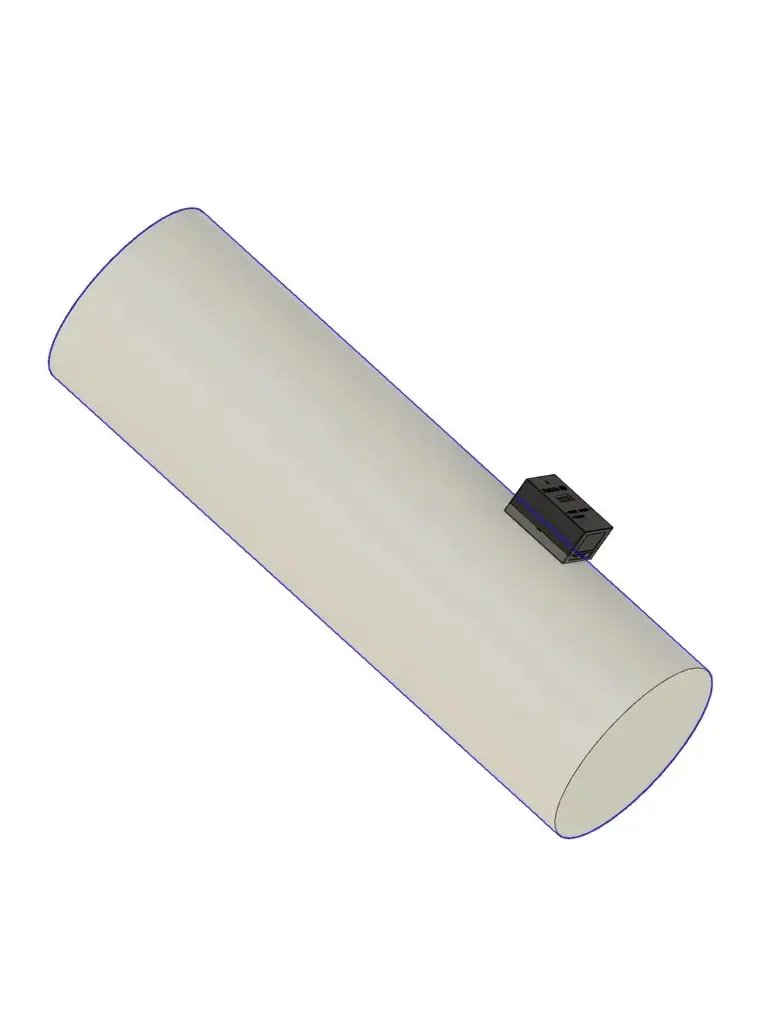
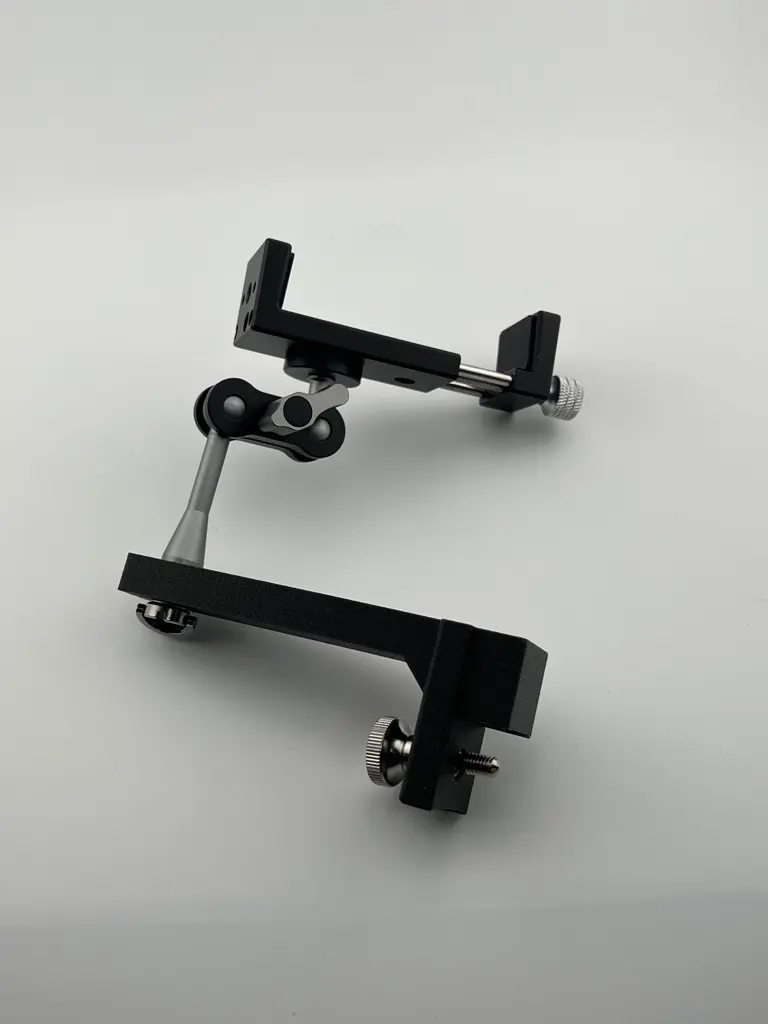
How to Use the Smartphone Holder
The HandyDob6 smartphone holder can rotate freely 360 degrees. It is also useful when additional top-side weight balance is needed, such as when mounting a Push-To Air unit or other accessories on the bottom.
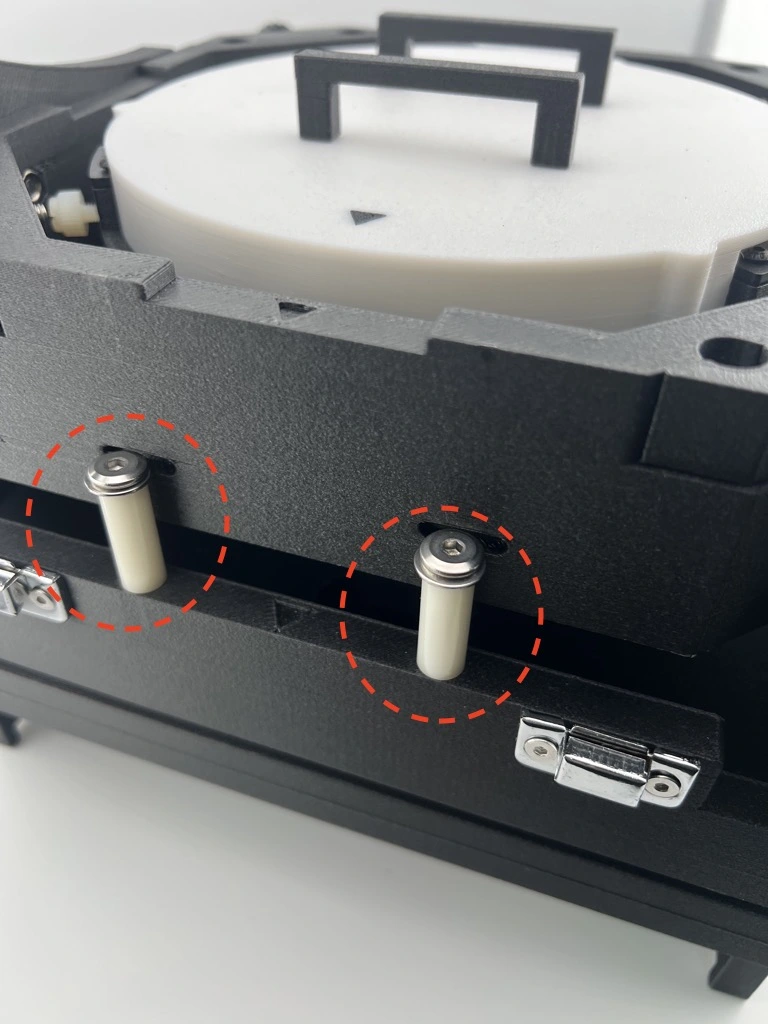
How to Install the Battery in the Red Dot Finder
⚠️ WARNING: KEEP OUT OF REACH OF CHILDREN
Button/coin batteries are hazardous and can cause severe or fatal injuries in 2 hours or less if swallowed or inserted. Seek immediate medical attention if ingestion or insertion is suspected.
Tips
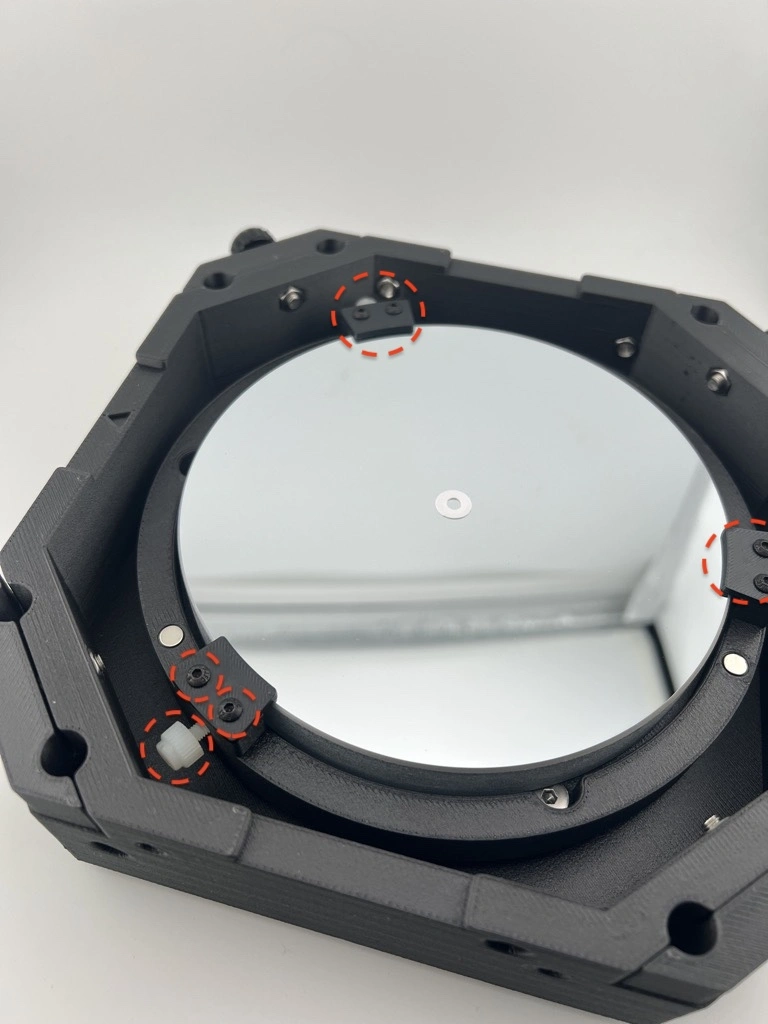
Loosening the Mirror Retention Screws After First Delivery
To prevent damage during shipping, the nylon bolts that secure the mirror and the bolts that hold the mirror clips may be tightened more firmly than necessary. However, if pressure is applied to the mirror, the surface can deform slightly, causing distorted star images. To maintain optimal optical performance, it is important to loosen the bolts so that the mirror rests without any mechanical stress.
Before your first use, slightly loosen the nylon bolts so that only the minimum pressure needed to keep the mirror from shifting remains. Likewise, loosen the mirror clips so they do not press down on the mirror surface.
If you replace the mirror with a thicker one and the height no longer matches the mirror clips, you can adjust the height by adding washers or springs beneath the clips.
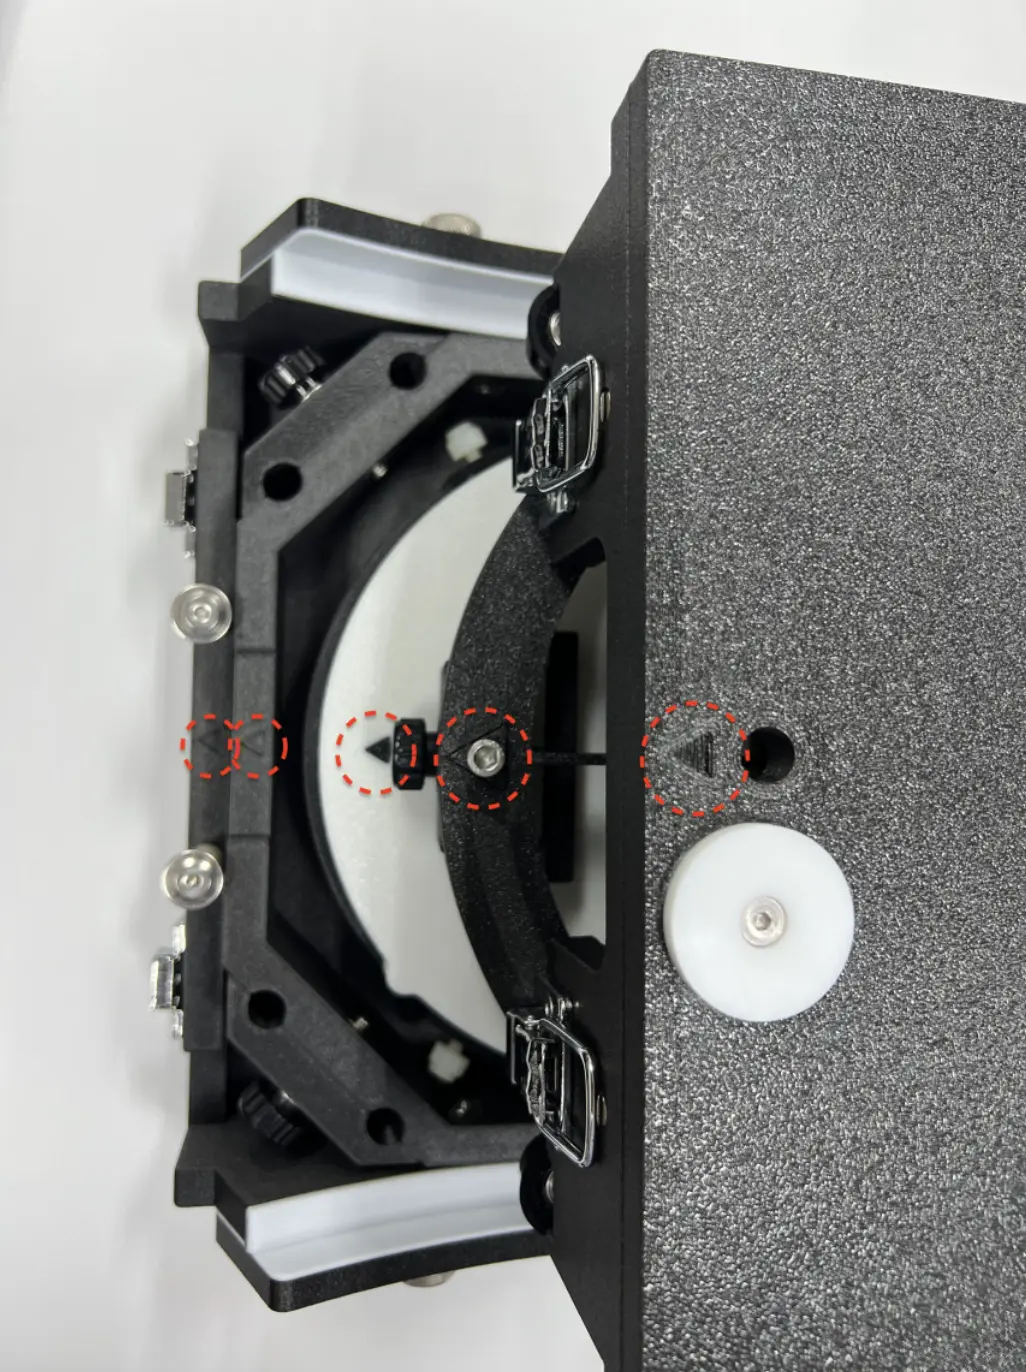
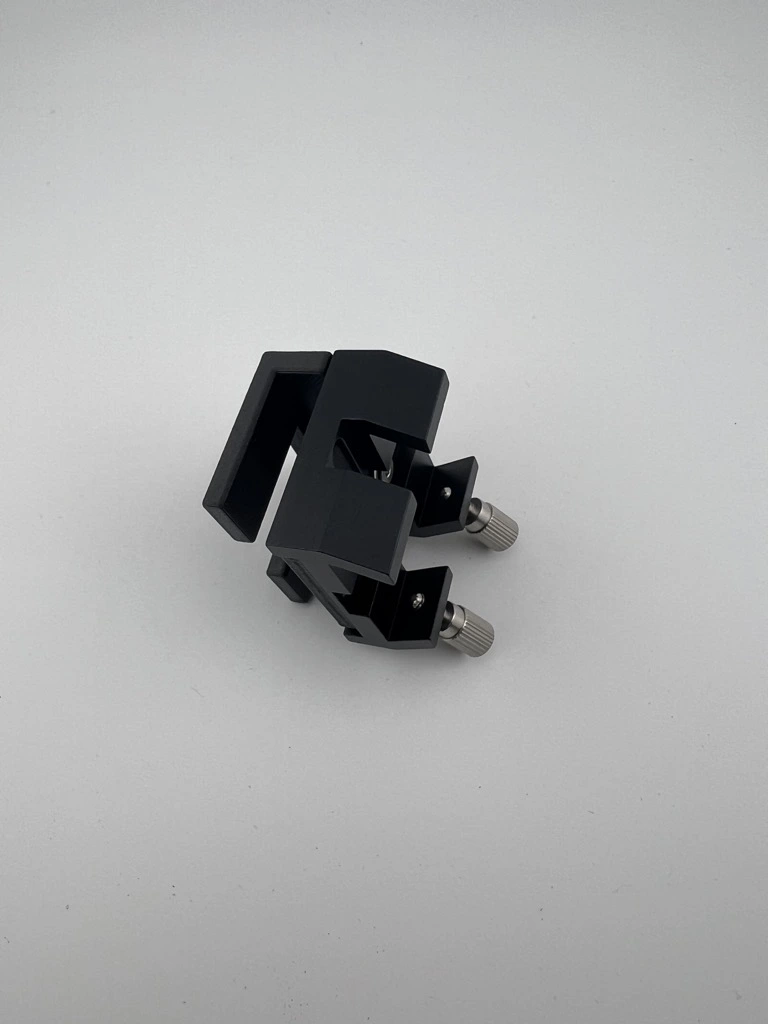
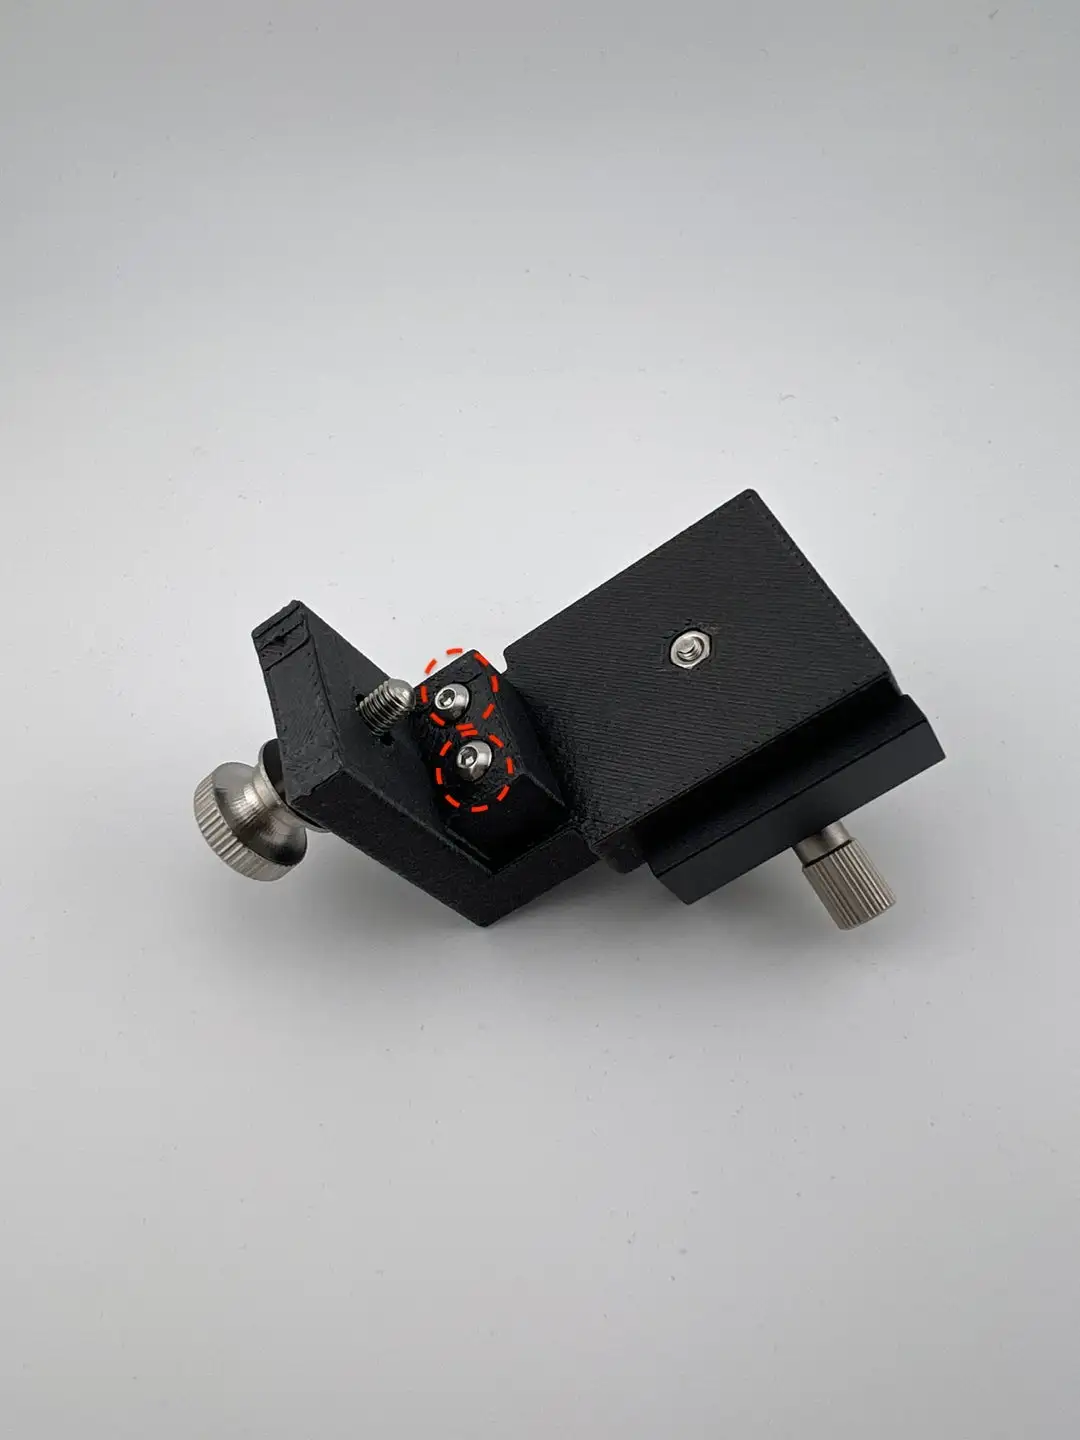
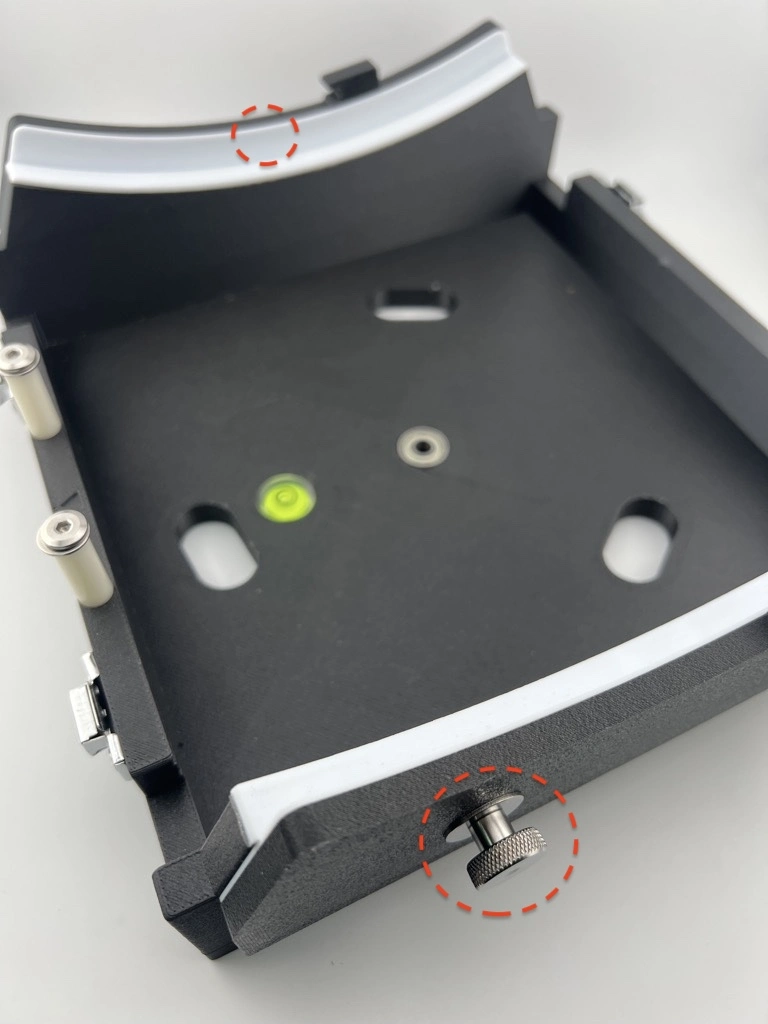
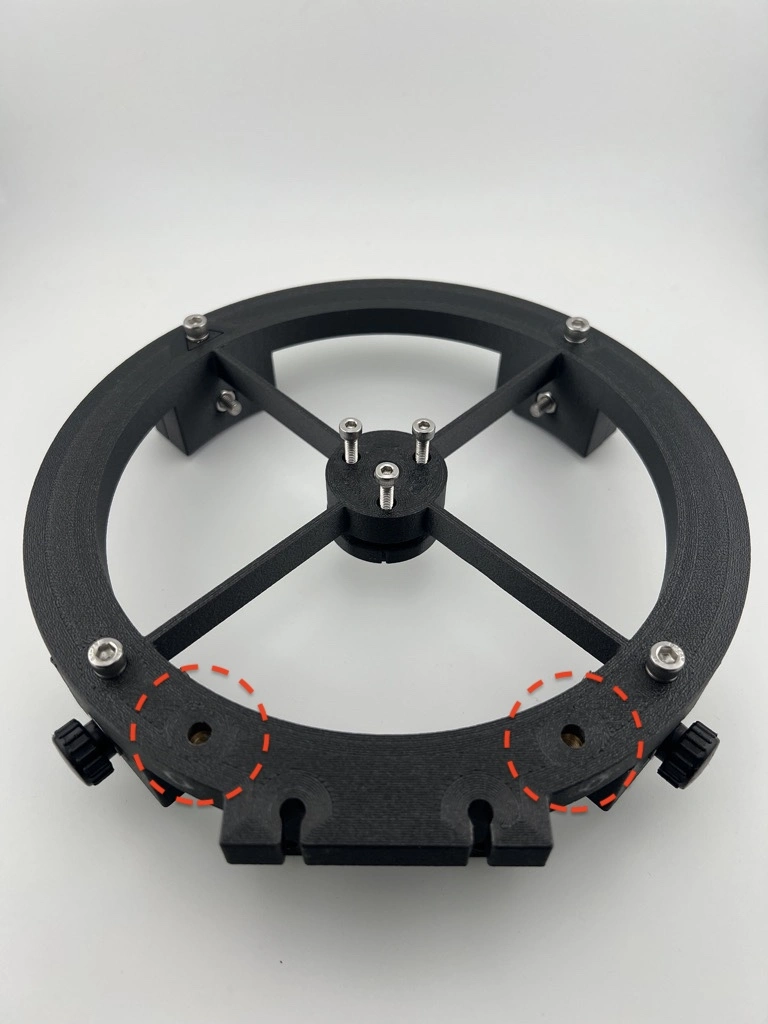
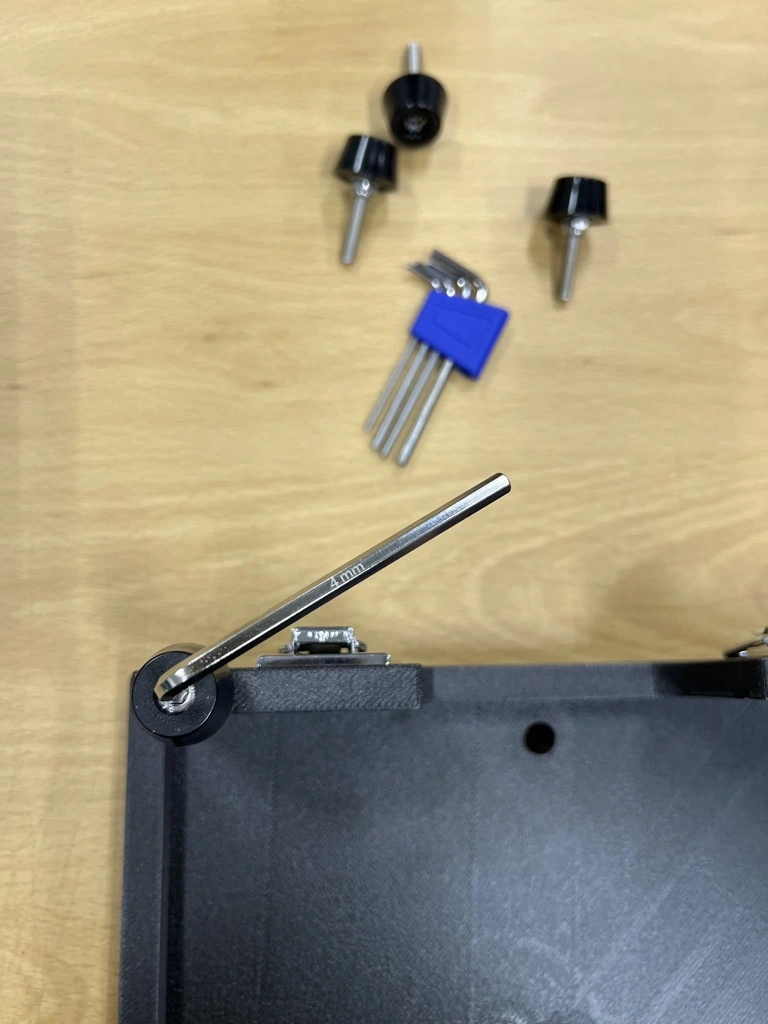
How to Adjust the Mounting Tension for the Finder or Smartphone Holder
If the finder or smartphone holder feels too tight or too loose when mounted, you can adjust it using the two position (tolerance) adjustment bolts shown below. As shown in the image, there are two bolts that secure the mounting position—these bolts control how tight or loose the fit is. Tightening the bolts will make the fit looser, while loosening the bolts will make it tighter.
Adjusting Altitude Bearing Tension and Balance
In Dobsonian telescopes, stiction refers to the phenomenon where the force required to start moving the telescope is greater than the force required to keep it moving. To reduce stiction, the classic combination of Teflon pads + textured laminate surface is commonly used.
HandyDob6 adopts a different approach by utilizing the natural surface texture of 3D-printed parts:
- Azimuth movement uses Teflon pads and a textured PEI plate printed bottom surface.
- Altitude movement uses side bearings printed with the 3D printer’s Fuzzy Skin feature, creating a textured surface. The Fuzzy Skin level was tuned through multiple iterations for best performance.
Unlike azimuth rotation, altitude movement is highly sensitive to balance changes. Depending on the eyepiece or accessories used, you may need to adjust the tension or balance.
Below are various ways to fine-tune the balance:
-
Adjust the side bearing guard knobs
- The knobs on each side adjust tension, and a thin Teflon pad is attached to the contact area.
-
Attach the included counterweight
- Attach the supplied counterweight to the mirror box to shift the balance downward.
-
Use the included rubber bands for added tension
- The rubber bands can provide additional tension. You may substitute different bands if you prefer softer or stronger tension.
-
Attach accessories to the bottom dovetail base included in the package
-
Upper-end balancing (for Push-To Air or ultralight eyepiece use)
- If the upper end becomes too light, you can attach a smartphone holder or another lightweight accessory to balance the system.
Adjusting the Minimum Altitude (Lowest Point of Vertical Movement)
The side bearings include stopper pins that prevent the telescope from slipping out when pointed too low.
There are three stopper positions (0°, 5°, 10°), and the default setting is 5°.
To change the position, gently tap the stopper pin out using a firm tool (e.g., small hammer) and relocate it to the desired hole.
Safety Feature to Prevent Telescope Over-rotation at High Altitudes
The rocker box includes a safety mechanism that prevents the telescope from tipping backward when pointed at high altitude angles.
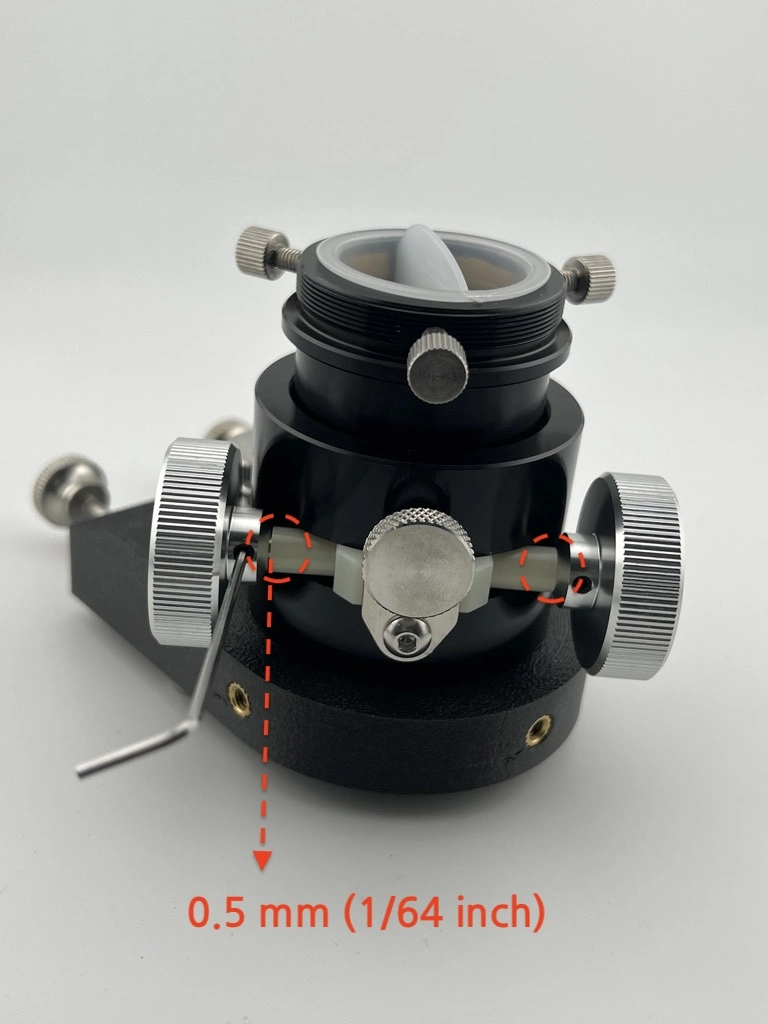
Adjusting the Focuser for Smoother Operation
We recently reviewed user feedback regarding the focuser performance of the HandyDob 6 shared within the community. As this feedback highlights simple adjustments that can significantly improve the smoothness of the focuser, we would like to share this information on our official website.
Adjusting the Focuser Knob Spacing
In some cases, the focuser knobs (the knobs on both sides) may be positioned too close together, causing unnecessary friction during rotation. This can be improved with the following steps:
- Loosen the set screws on both focuser knobs and create a gap of approximately 0.5 mm (1/64 inch). (Use a 1.5 mm hex key)
- Proper spacing helps reduce friction caused by contact between internal plastic components, resulting in smoother operation.
Lubricating the Steel Rod and Focuser Track
Additional lubrication can further enhance the feel of the focuser.
- Remove the plastic pressure plate that presses against the focuser steel rod. (Use a 2.5 mm hex key)
- Apply a thin layer of grease to the inner surface of the pressure plate where it contacts the steel rod. As the focuser is operated, the grease will naturally spread evenly along the focuser track. (If desired, a thin layer of grease may also be applied directly to the focuser track.)
- Reassemble the steel rod in the reverse order. When tightening the pressure plate bolts, do not overtighten—apply just enough tension to allow smooth focuser movement.
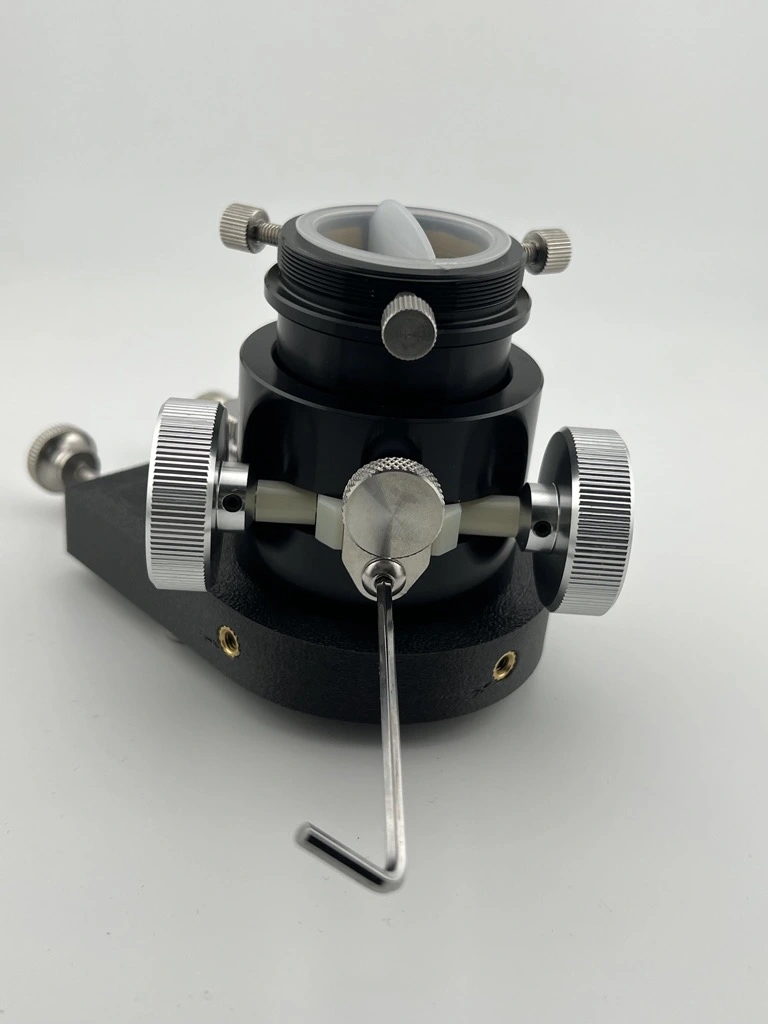
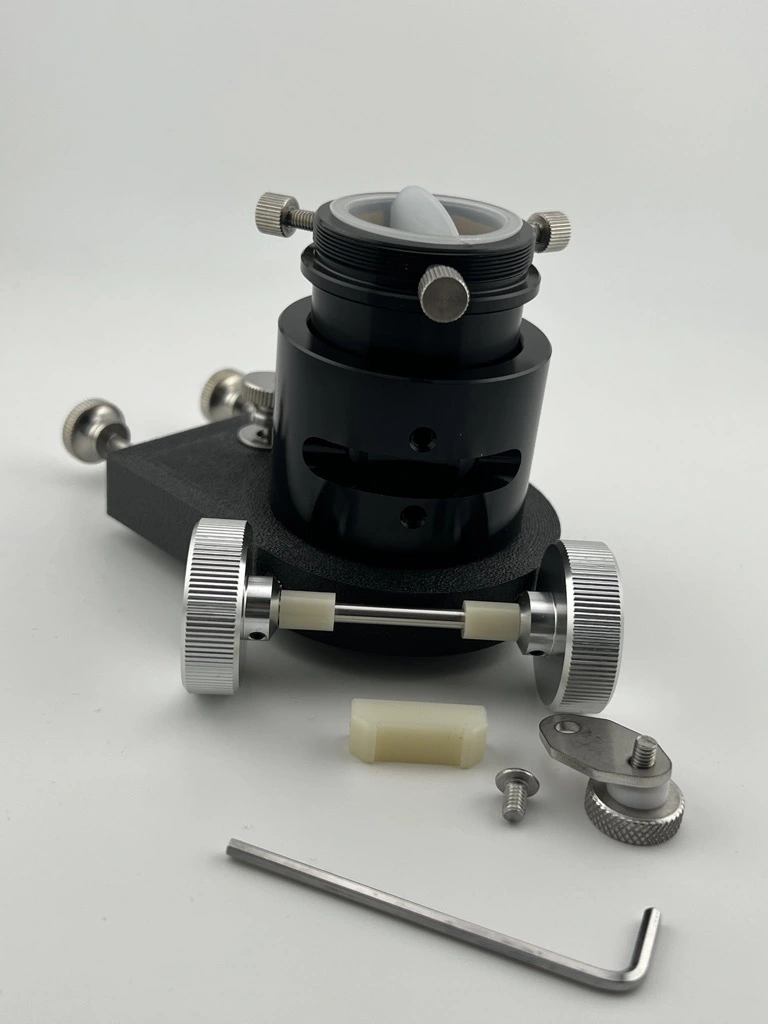
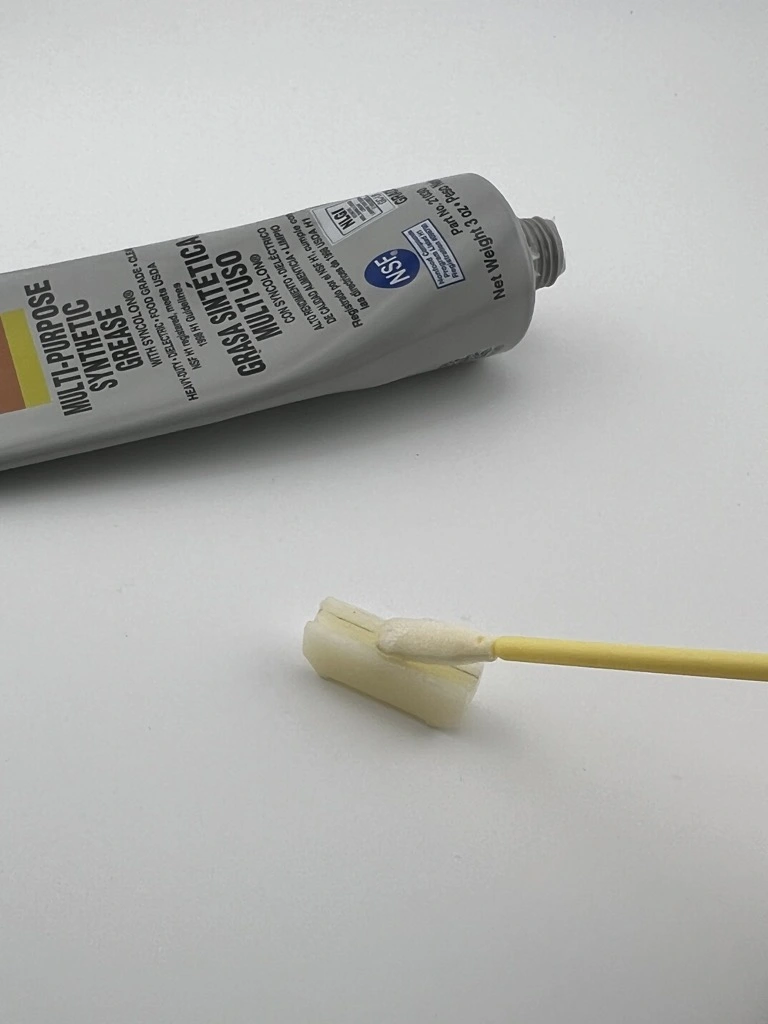
With these simple adjustments and basic maintenance, the usability of the focuser can be significantly improved. If your focuser feels stiff or rough, we recommend trying the steps above.
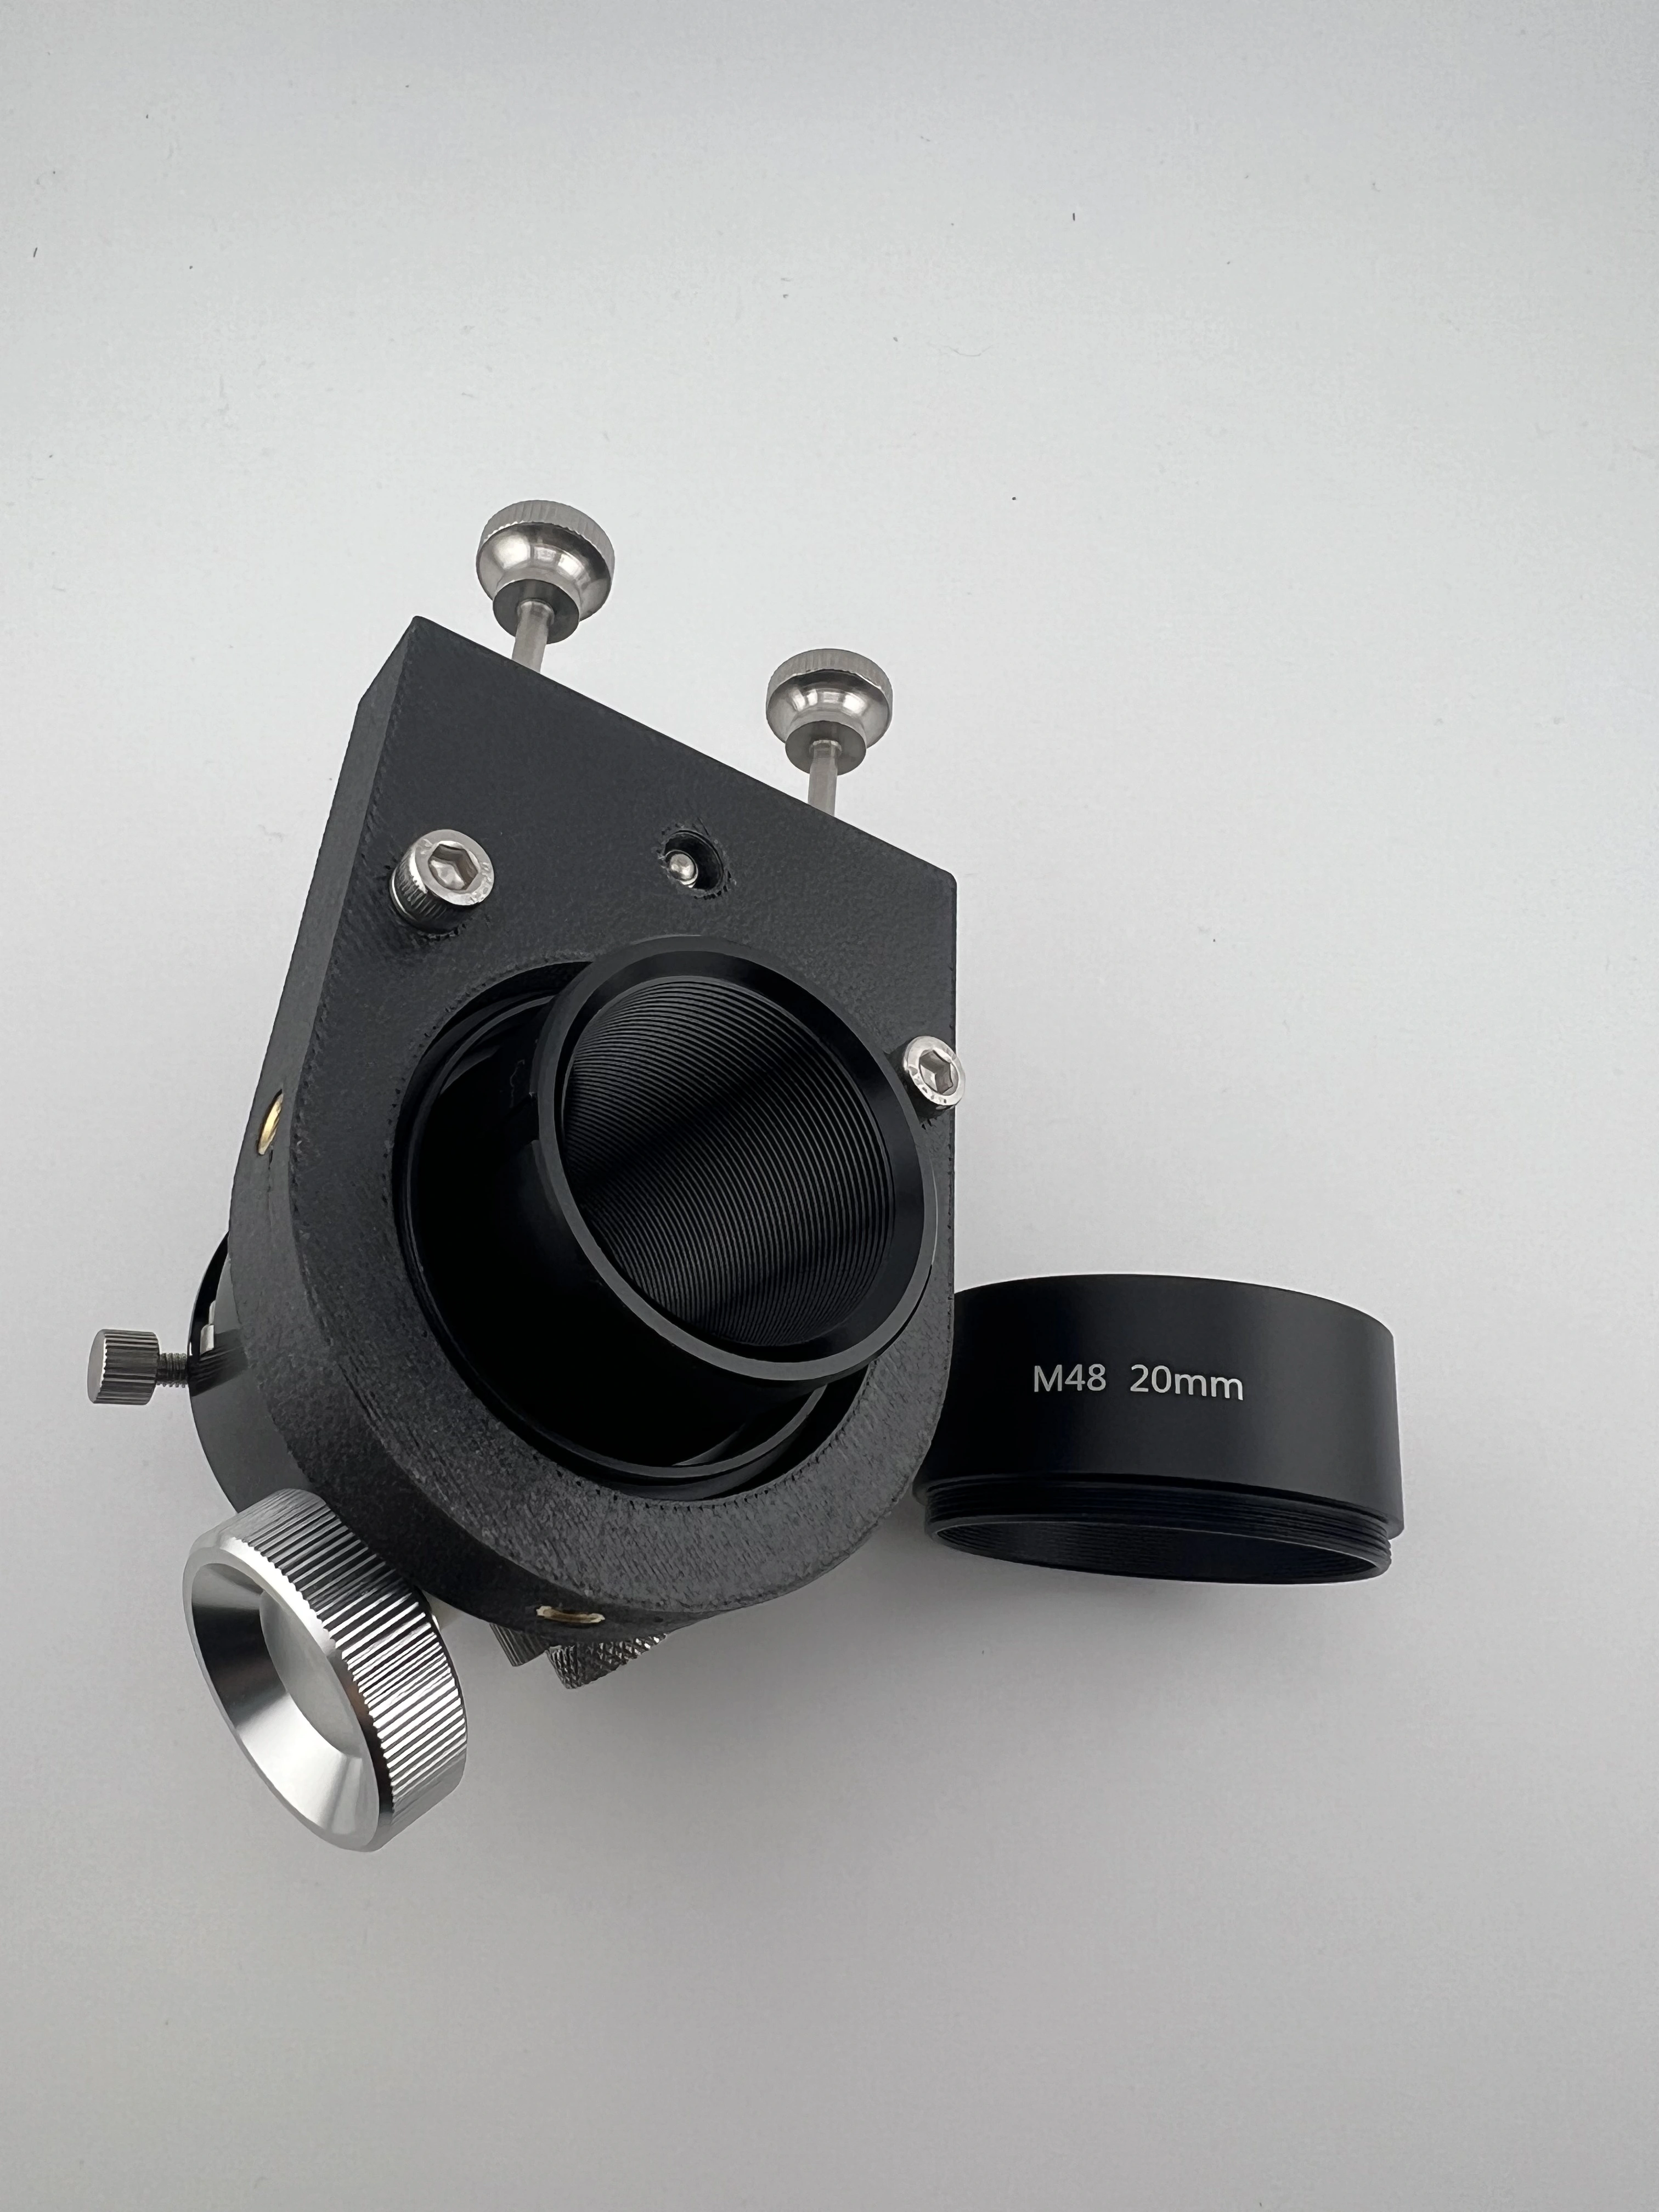
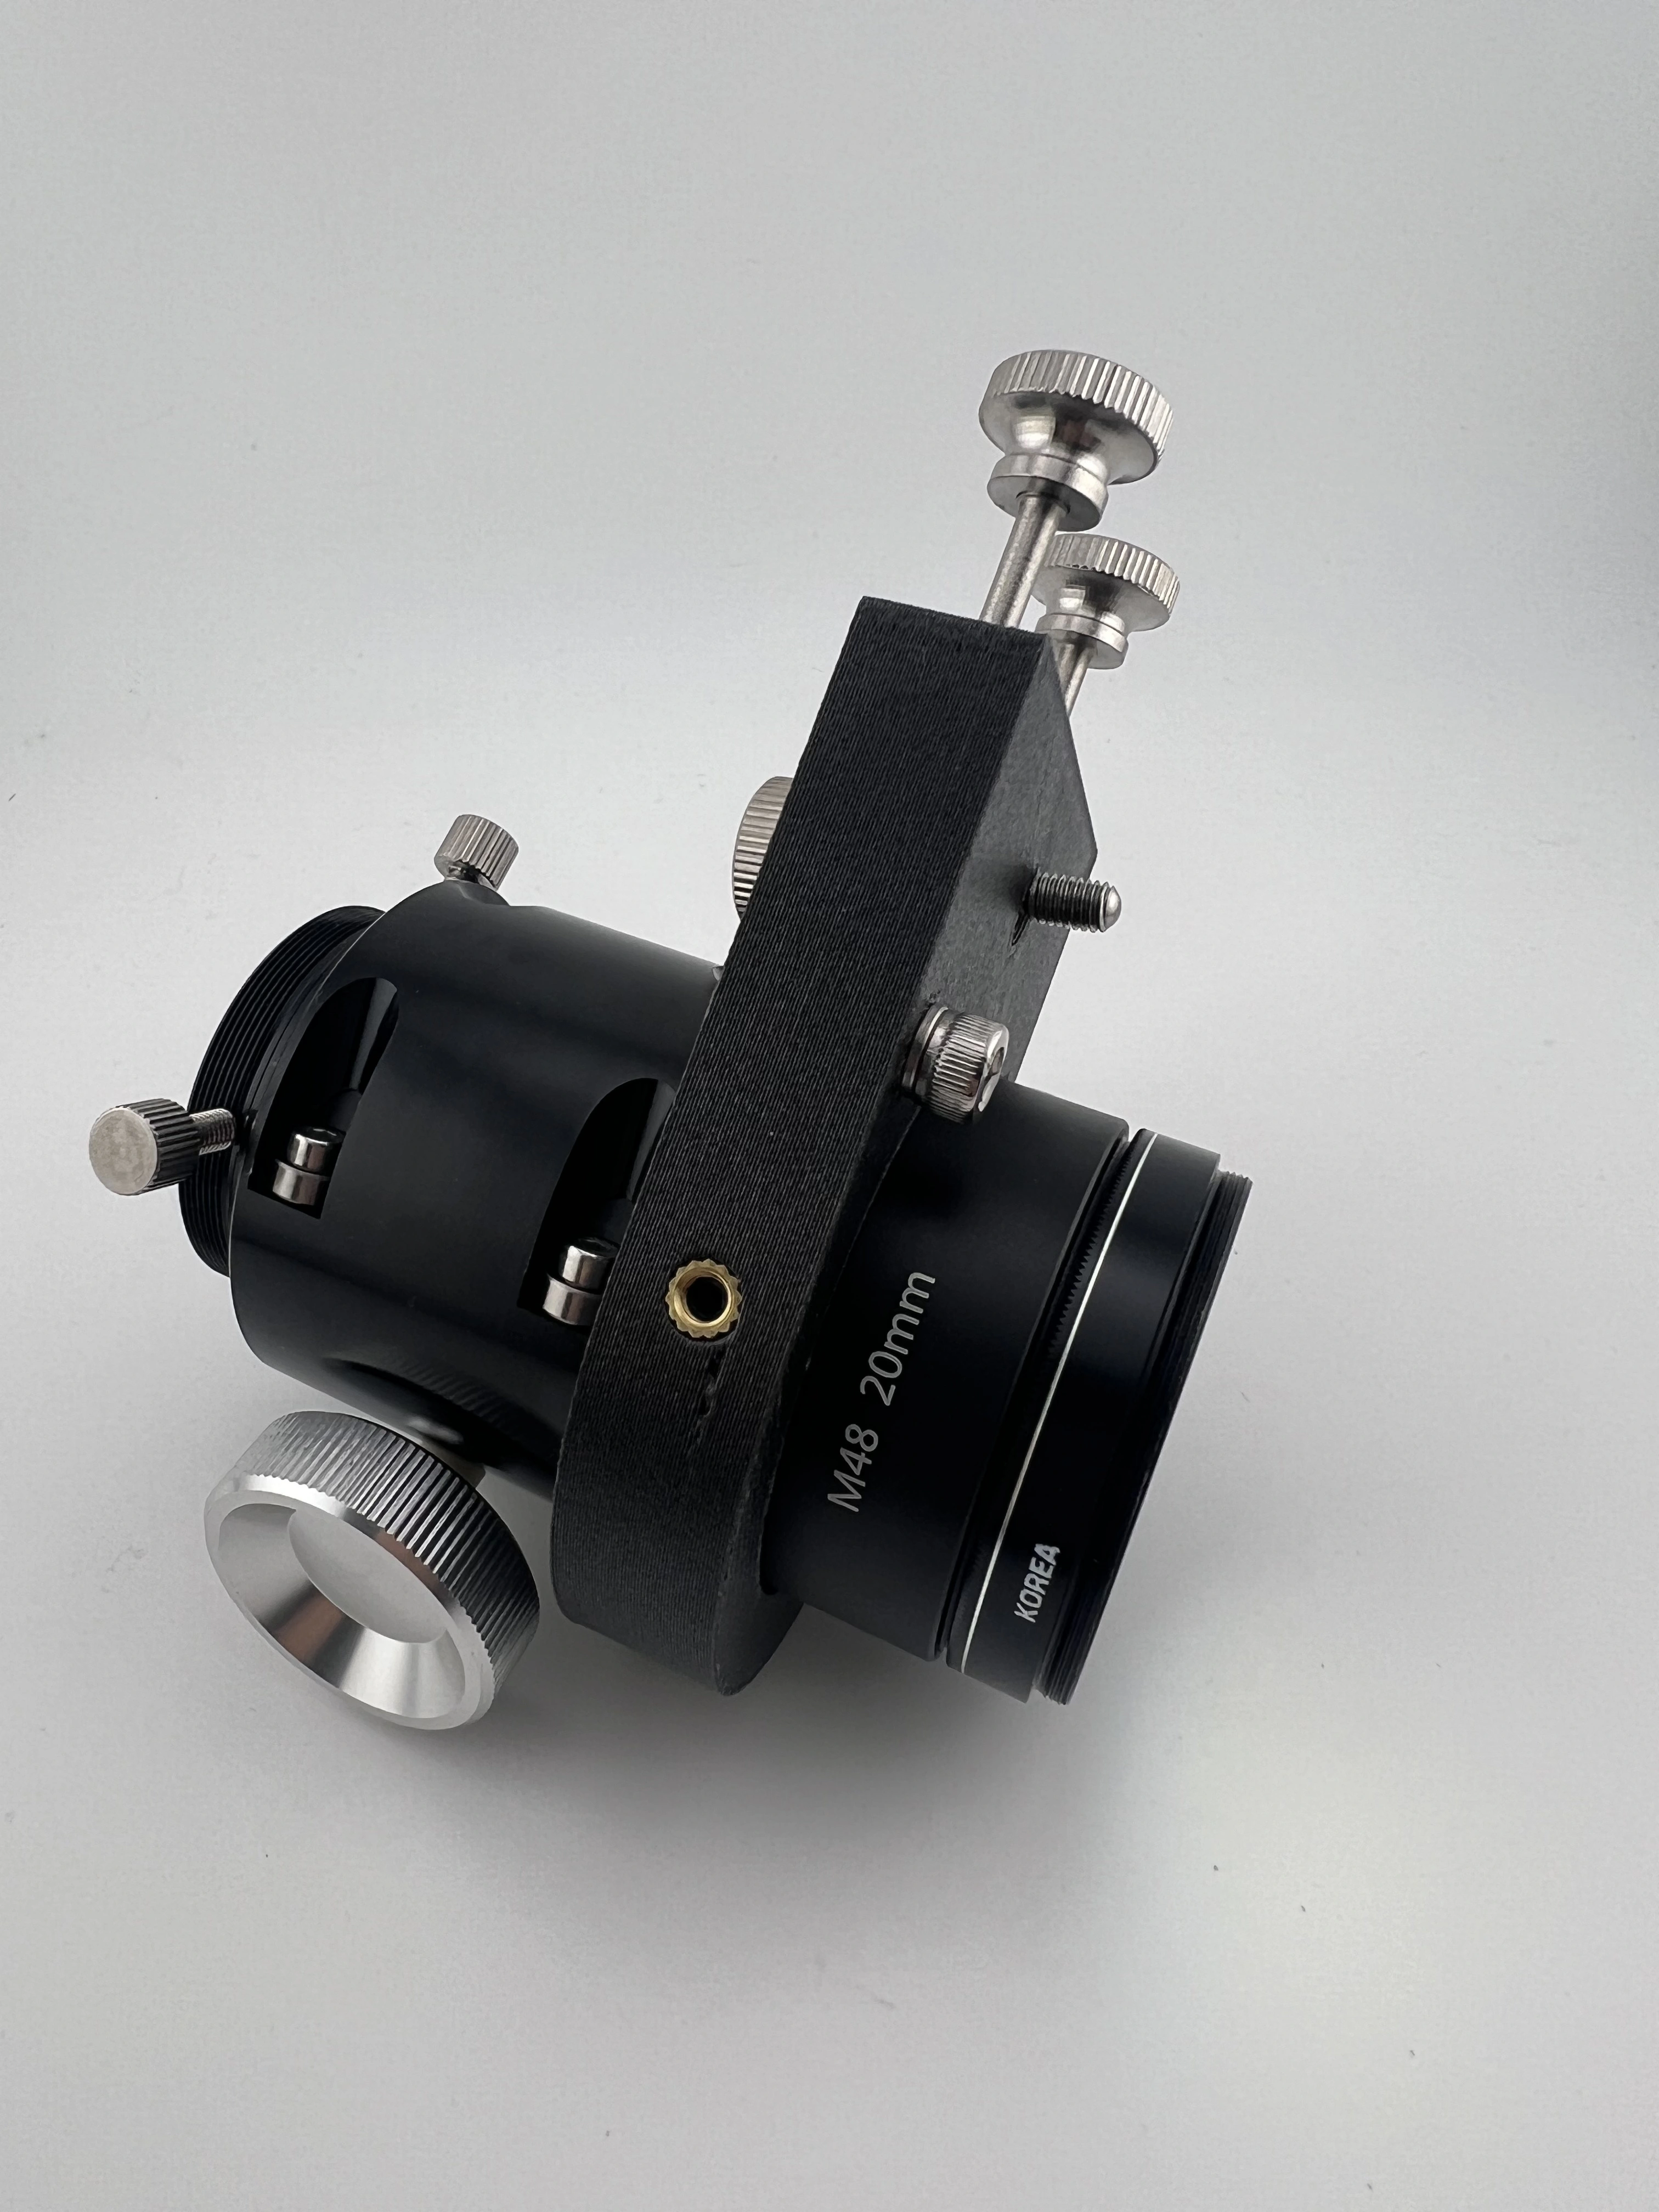
How to Use 2-Inch Filters
The focuser of the HandyDob 6 is 1.25-inch standard, so a 2-inch filter cannot be attached directly.
However, by attaching an M48 extension tube (20 mm length) to the focuser, you can use a 2-inch filter. The images below show the step-by-step order for installing a 2-inch filter.

How to Improve Truss Pole Stability
Dobsonian telescopes that use a truss pole structure, such as the HandyDob, may experience vibration or slight sagging of the upper structure if the truss assembly does not have sufficient rigidity.
To address this, the HandyDob is supplied with four anti-vibration brackets as standard equipment. These anti-vibration brackets feature a raised groove design, which helps prevent them from slipping off the truss poles during installation or removal of the fabric shroud.
While reviewing user experiences and feedback shared within the community regarding the HandyDob 6, we realized that we had not previously explained clearly enough how important it is to firmly press the anti-vibration brackets downward to apply proper tension to the trusses in order to improve collimation stability. We would therefore like to provide this additional guidance on our website.
According to user feedback, during assembly it is critical to press the anti-vibration brackets (tensioning bars) firmly downward so that sufficient tension is applied to the truss poles. One user monitored a laser collimator while tilting the telescope up and down and observed that when the tensioning bars were set too loosely, the laser spot on the primary mirror shifted by approximately 3–4 mm. This indicates that collimation is changing due to slight sagging of the upper structure.
Therefore, during assembly, please press the tensioning bars (anti-vibration brackets) down firmly until a clear and solid tension is felt in the truss poles.
With this adjustment, it is not possible to completely eliminate collimation changes inherent to portable truss Dobsonian designs, but their impact can be significantly reduced, resulting in a more stable observing experience.

Choosing the Focuser Position Based on Dominant Eye (Left / Right)
The HandyDob6 allows the focuser to be installed on either the left or the right side. The upper cage is fully symmetrical, and the finder can also be mounted on either side.
By default, the arrow indicator on the upper cage is oriented for right-eye dominant users.
However, if your left eye is dominant, you may find it more comfortable to install the focuser on the right side. Feel free to adjust the focuser placement based on your observing preference.
Notes for Air Travel
Carrying Convenience
The HandyDob6 carrying case includes a luggage strap on the back, allowing you to securely place it on top of your suitcase for convenient transport.
Carry-on Weight & Packing
The total weight is approximately 8 kg, which meets the typical airline carry-on weight limit of 10 kg. You may also remove unused standard accessories to free up space, allowing you to pack multiple eyepieces and collimation tools inside the case.
TSA Security
No issues at all — the HandyDob6 in the standard package has passed through TSA security without any problems.
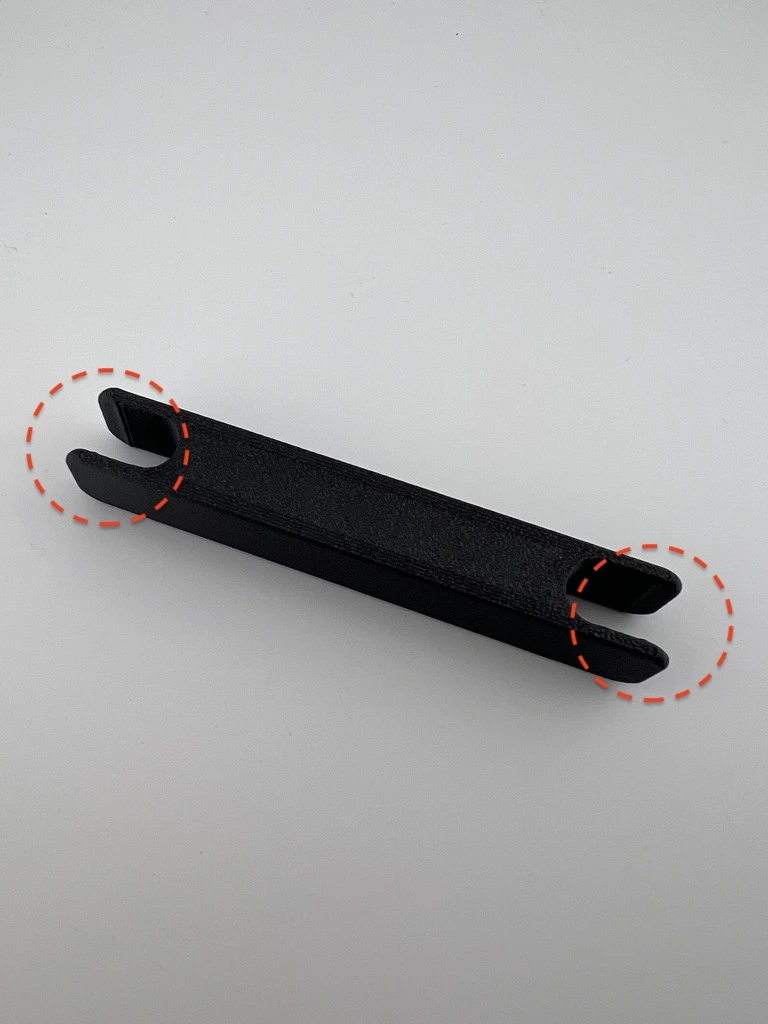
However, TSA officers may ask you to take out the included mini hex wrench to measure its length and confirm that it complies with carry-on regulations. For convenience, we recommend storing the mini hex wrench in an easily accessible place.
The mini hex wrench is 8.2 cm long, which meets the airline carry-on rule requiring tools to be under 10 cm in length.

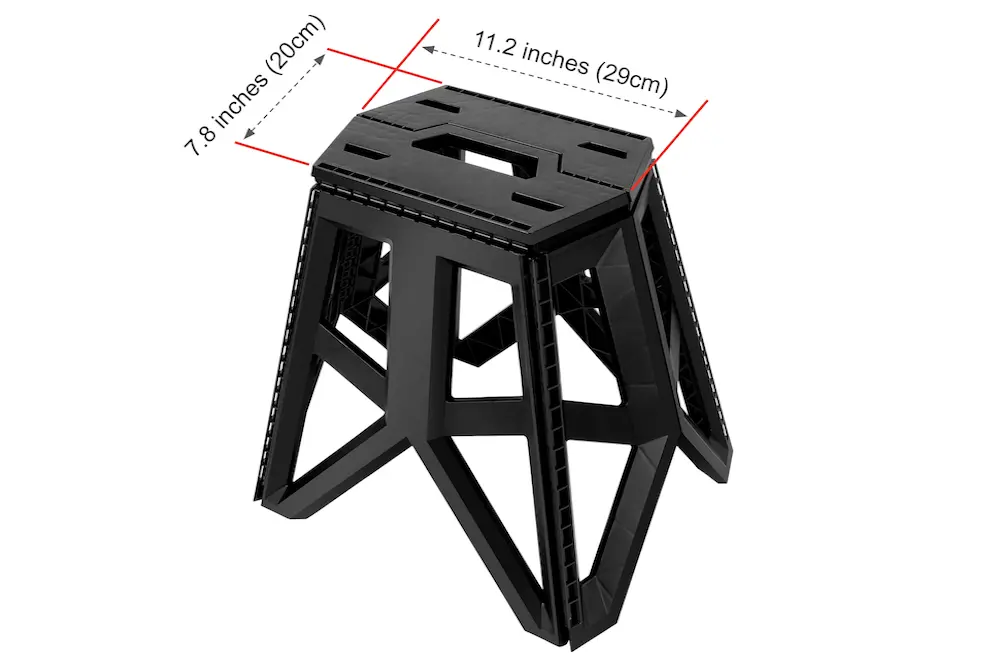
Recommended Tripod Alternative – Folding Stool
If you use a regular photography tripod instead of an astronomical telescope tripod(e.g., the Photoclam Astro Tripod or TC40) with the HandyDob6, the small contact area may cause vibrations and instability.
As an alternative to a telescope tripod with a wider contact area, we recommend using the folding stool shown below. You can find it on Amazon or at most large retail stores.
If you remove the four rubber feet on the HandyDob6, you can place it directly on a hexagonal camping-style folding stool.
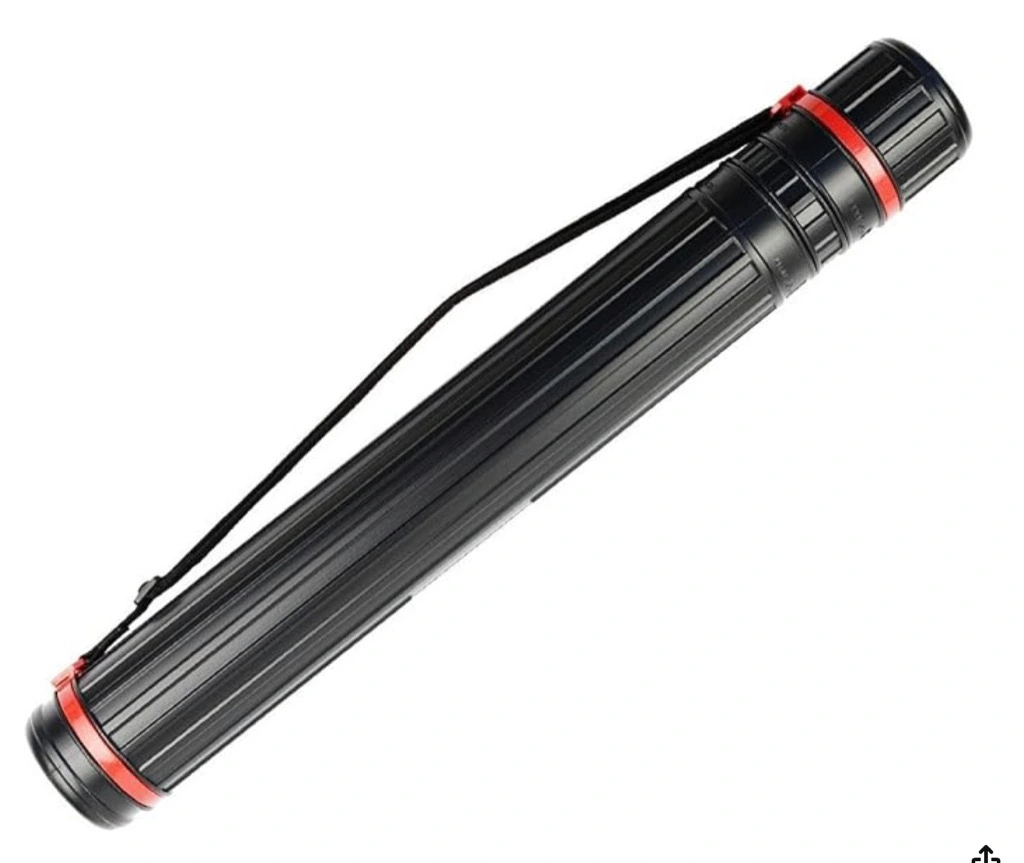
Recommended Case for Storing Truss Poles
When assembling the HandyDob6, the step that takes the most time is connecting the 16 truss poles. For those who prefer to store the poles separately, we recommend the case below. This case can hold 8 connected pole units (a total of 16 poles) without disassembly. It is also widely available through various online marketplaces.
- Name: Extendable Poster Carrying Case
- Length: 45cm–70cm (17.72in–27.56in)
- Inner Diameter: 6.6cm (2.60in)
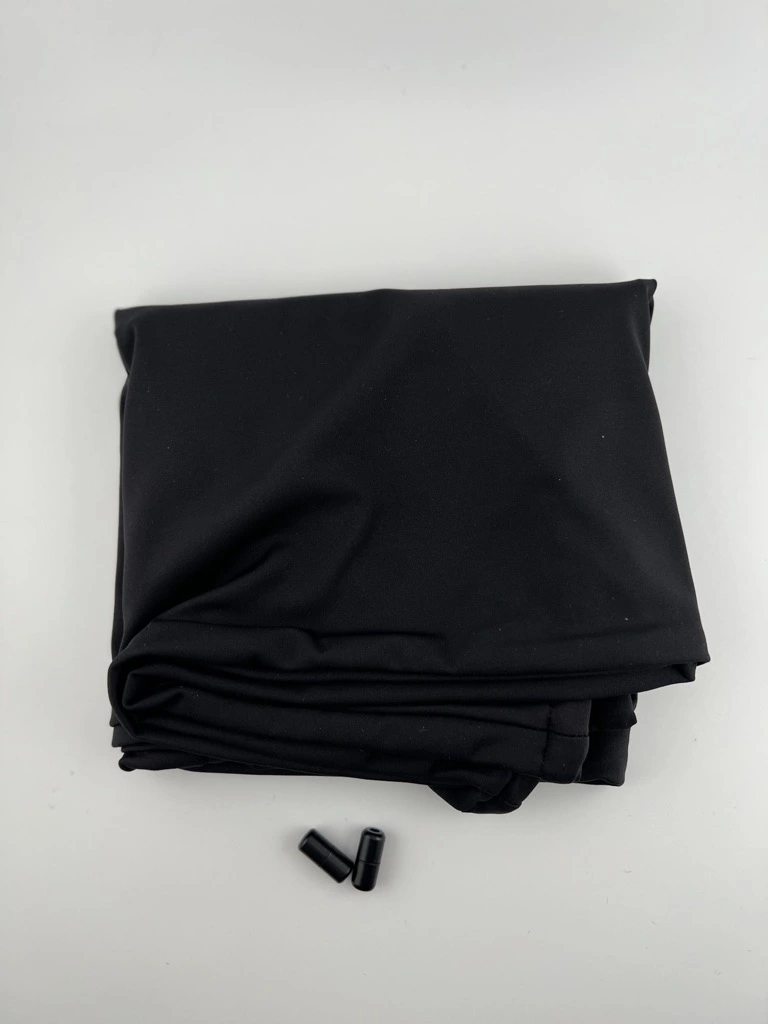
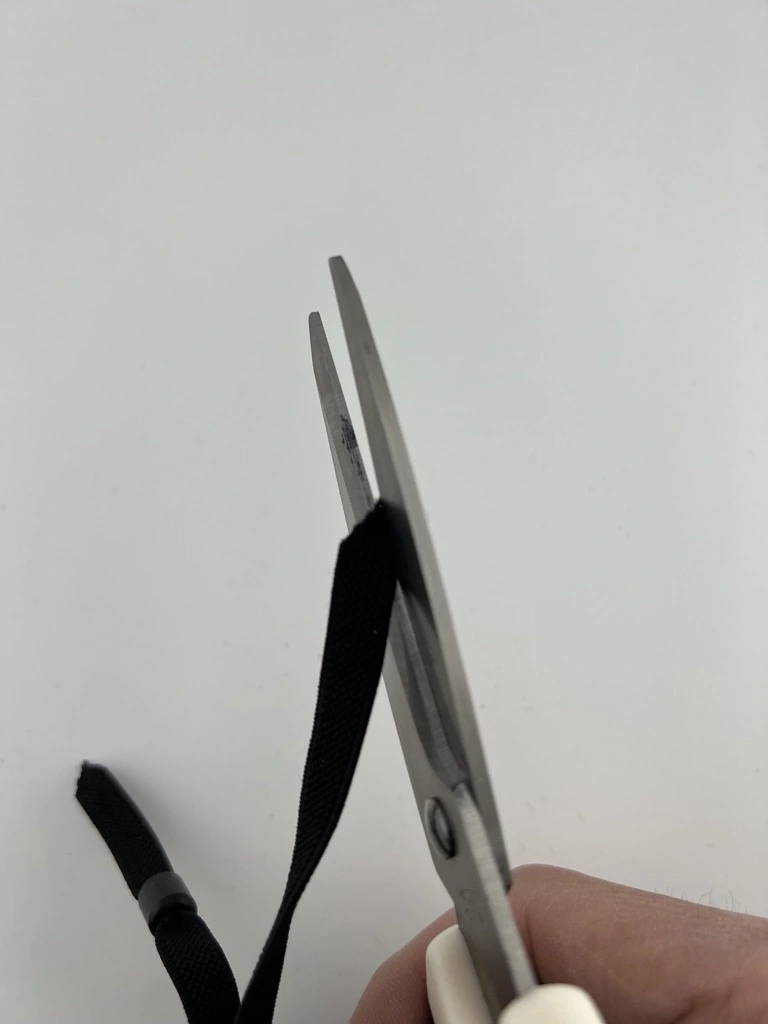
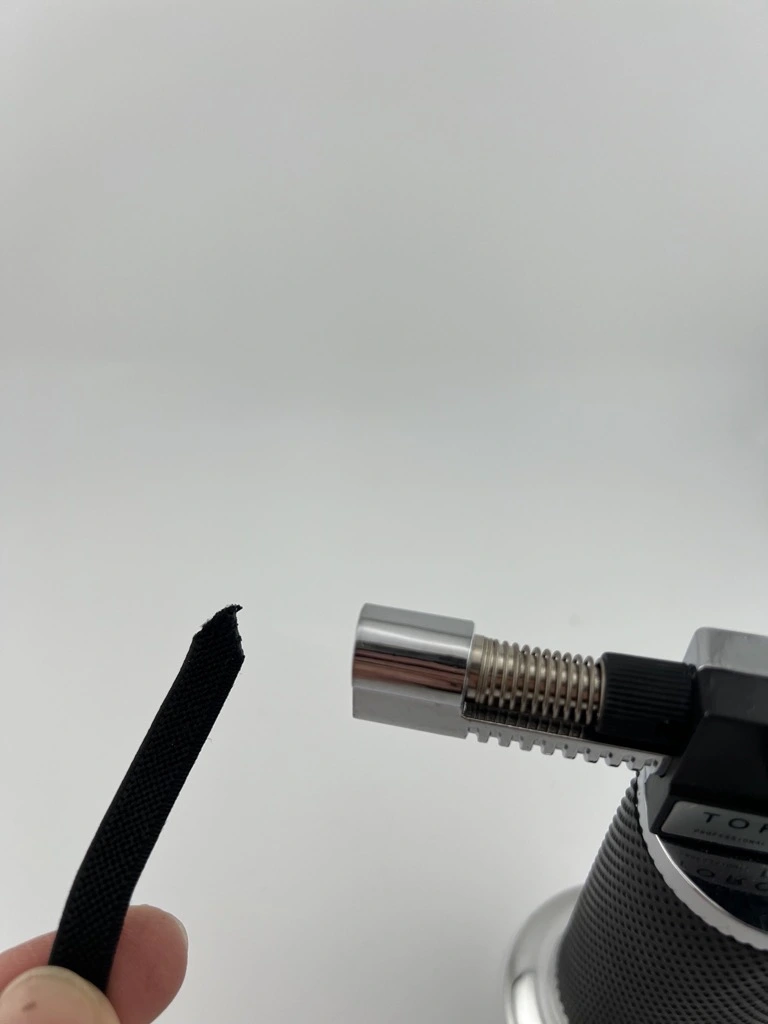
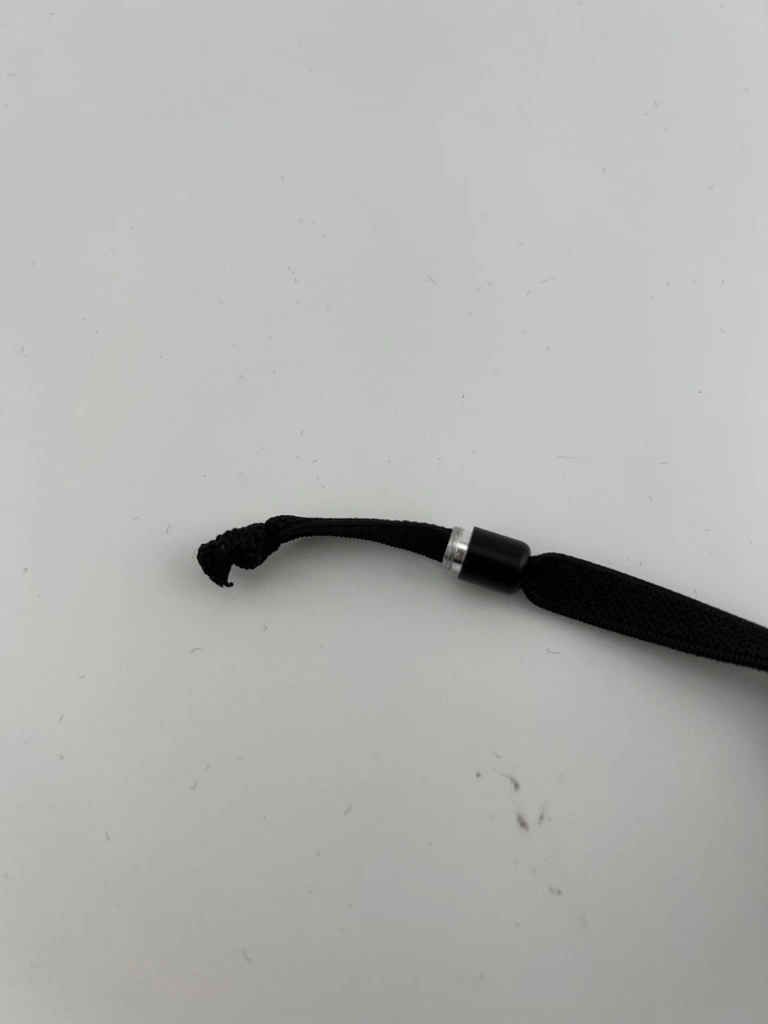
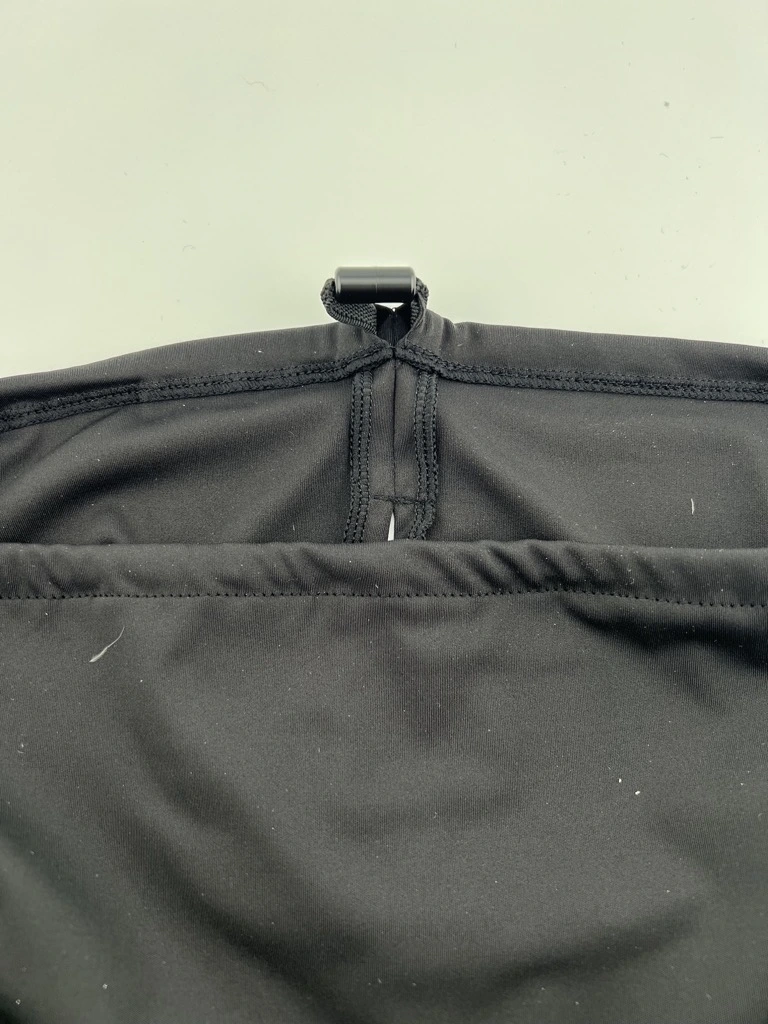
How to Attach the Buckle (Capsule Type) to the Light Shroud Elastic Band
You can neatly tuck the exposed blackout rubber band inside the shroud. However, the hole in the capsule-shaped buckle is quite small, so inserting the rubber band as-is can be difficult. If you cut the end of the rubber band to a sharp point and lightly melt it with a lighter to harden it, you can insert it through the buckle hole much more easily, as shown in the photos below.

Origin
- Frame manufacturing and assembly: South Korea
- Made in Korea (Body 3D Printed and Assembled in Korea, Parts made in China)
Warranty & Support
- 1-year warranty (excluding user damage)
- Note: HandyDob6 travel bag is not covered under warranty
- Technical Support: support@builtastro.com
- Service & Support Inquiries:
HandyDob Gallery
Where to Buy HandyDob
Where can I find reviews of your products?
Our products are already well received in South Korea, with a large number of units sold through local astronomy communities and online marketplaces. We continue to receive high ratings and positive feedback from users. You can check customer reviews and product details on our Korean online store:
- Naver Smart Store: https://smartstore.naver.com/builtastro
- Amazon US: https://www.amazon.com/dp/B0FG7NT9LX
Have you heard of Push-To Air, the wireless encoder system for Dobsonian and Alt-Azimuth mounts?